aloha-trades.github.io

Aloha Trades
Overview
The problem: UHM students have a “rapid” churn rate in goods and services. Students leave the dorm for an on-campus apartment and need to get rid of dorm-specific stuff and acquire apartment-specific stuff. Students graduate and need to get rid of stuff because they’re moving off-island. There are therefore a tremendous amount of “campus-specific” goods and services that could be more effectively recycled and reused if there was an effective marketplace for these specific kinds of items.
The solution: The Aloha Trade is an application for UHM students to facilitate buying and selling of student-related goods and services. By creating a page for only UHM students, we strive to alleviate the awkwardness of dealing with scammers and bots.
PROJECT LINKS
Aloha Trades Website
![]()
Aloha Trades Organization Page (GitHub)
Team Contract Page
M1 - Project Page
M2 - Project Page
M3 - Project Page
User Guide
Application functionality
In the following section, we will go over functionalities of our page. In order to help visualize this, the diagram shown below was created:
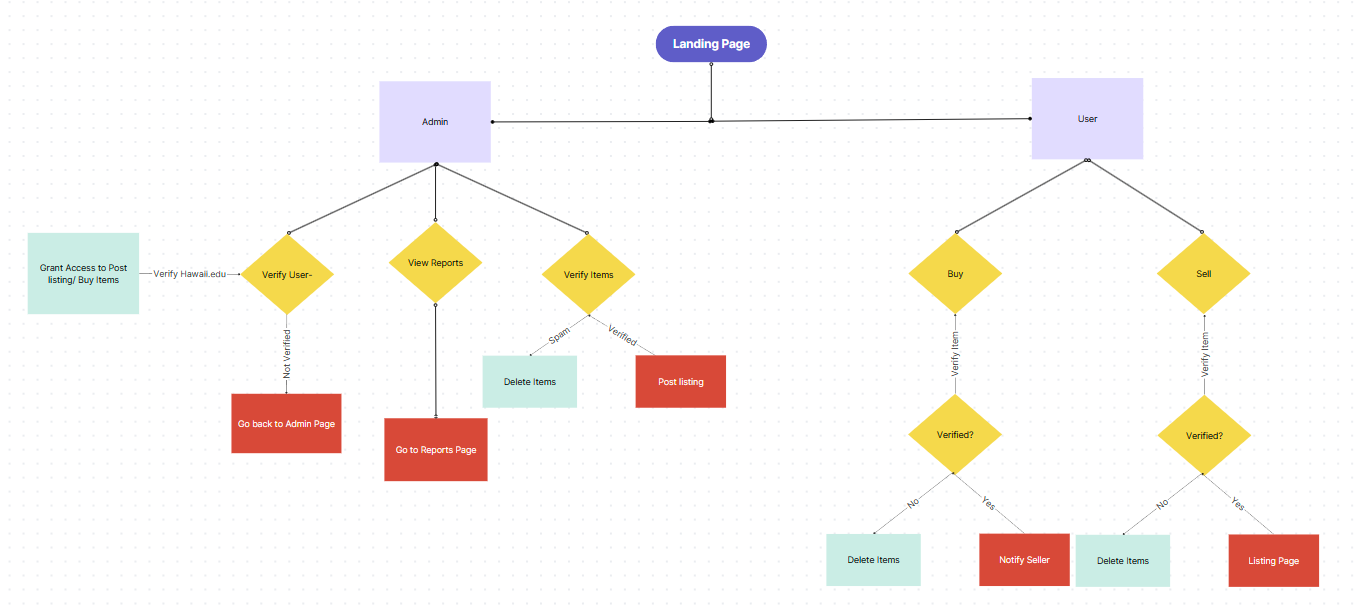
Landing page after loading onto website
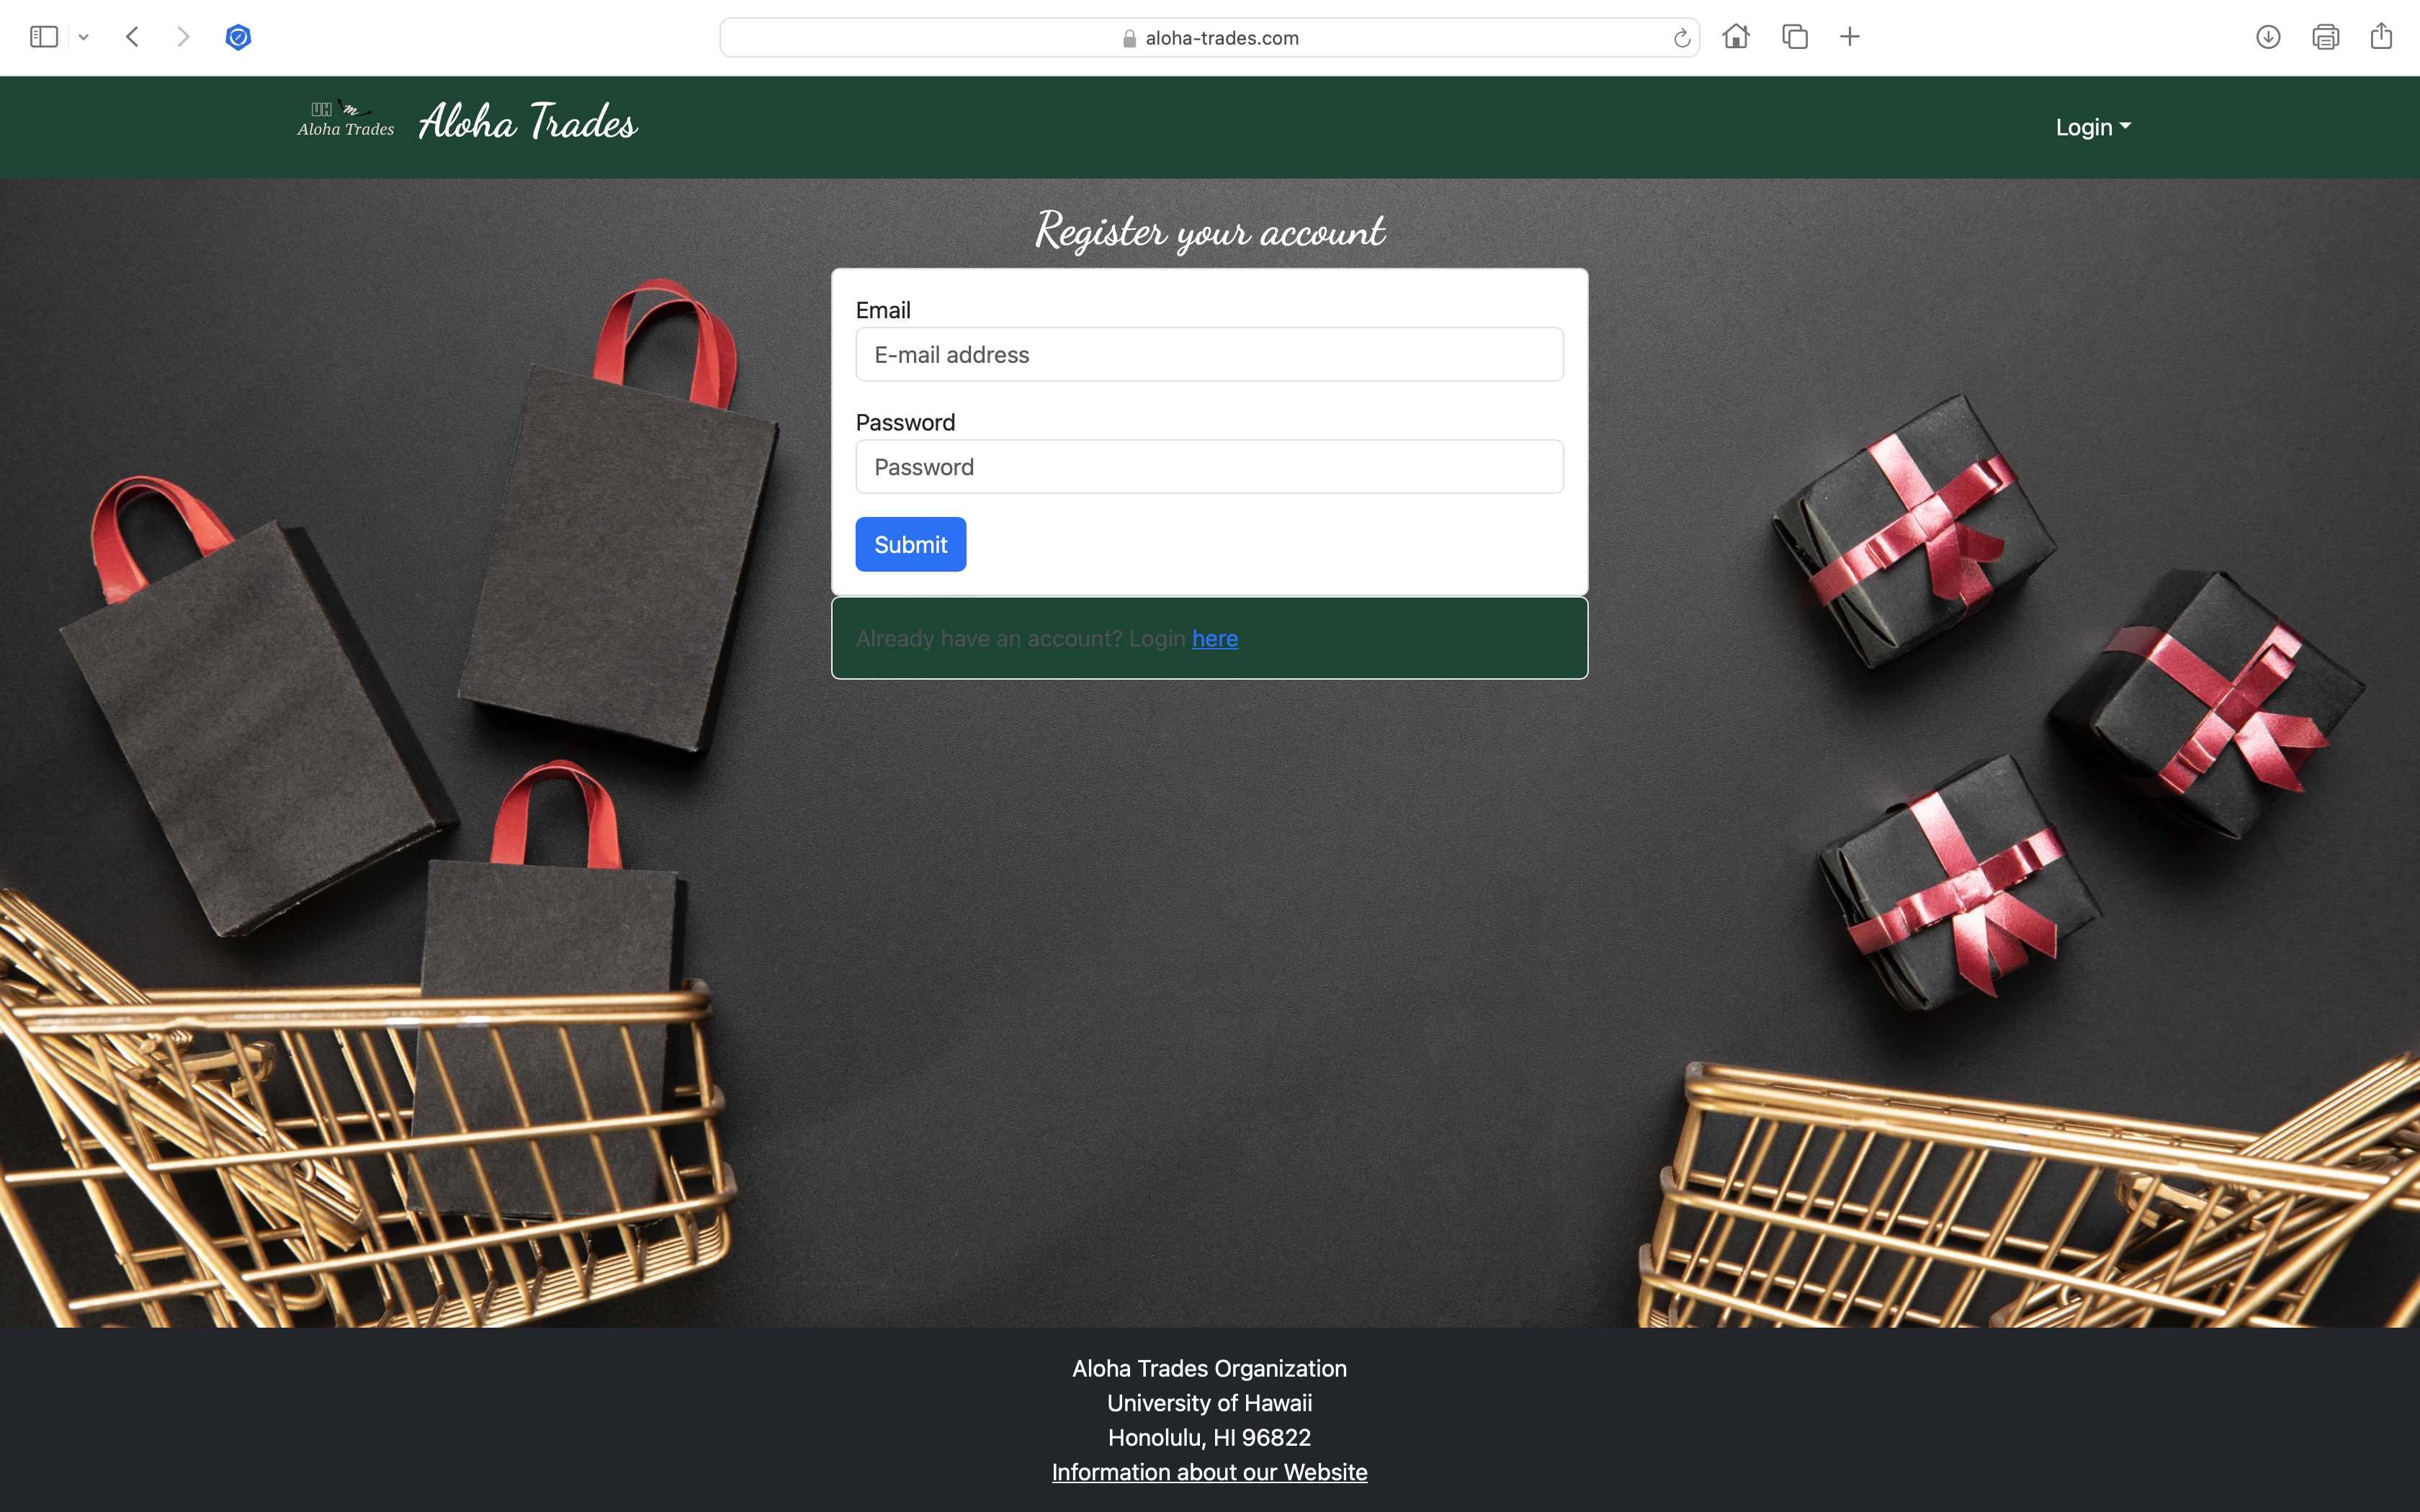
When you enter our site, url is: https://aloha-trades.com, this is what should be displayed. You will have to have a UH account in order to use this website:

The next step is to use the Login menu to either Login to an existing account or register a new account.
There are several default accounts that you can use to test the site but note not all accounts are used if running localhost version.
Login information below: username - password
Users:
- john@foo.com - changeme
- student1@hawaii.edu - student1
- student2@hawaii.edu - student2
- student3@hawaii.edu - student3
- student4@hawaii.edu - student4
- student5@hawaii.edu - student5
- student6@hawaii.edu - student6
- student7@hawaii.edu - student7
Admin:
- admin@foo.com - changeme
Sign-up page
Alternatively, clicking on the Login link, then on the Sign Up menu item displays this page:
Landing (after Login) page, non-Admin user
Once you log in (either to an existing account or by creating a new one), the navbar and page changes as follows:
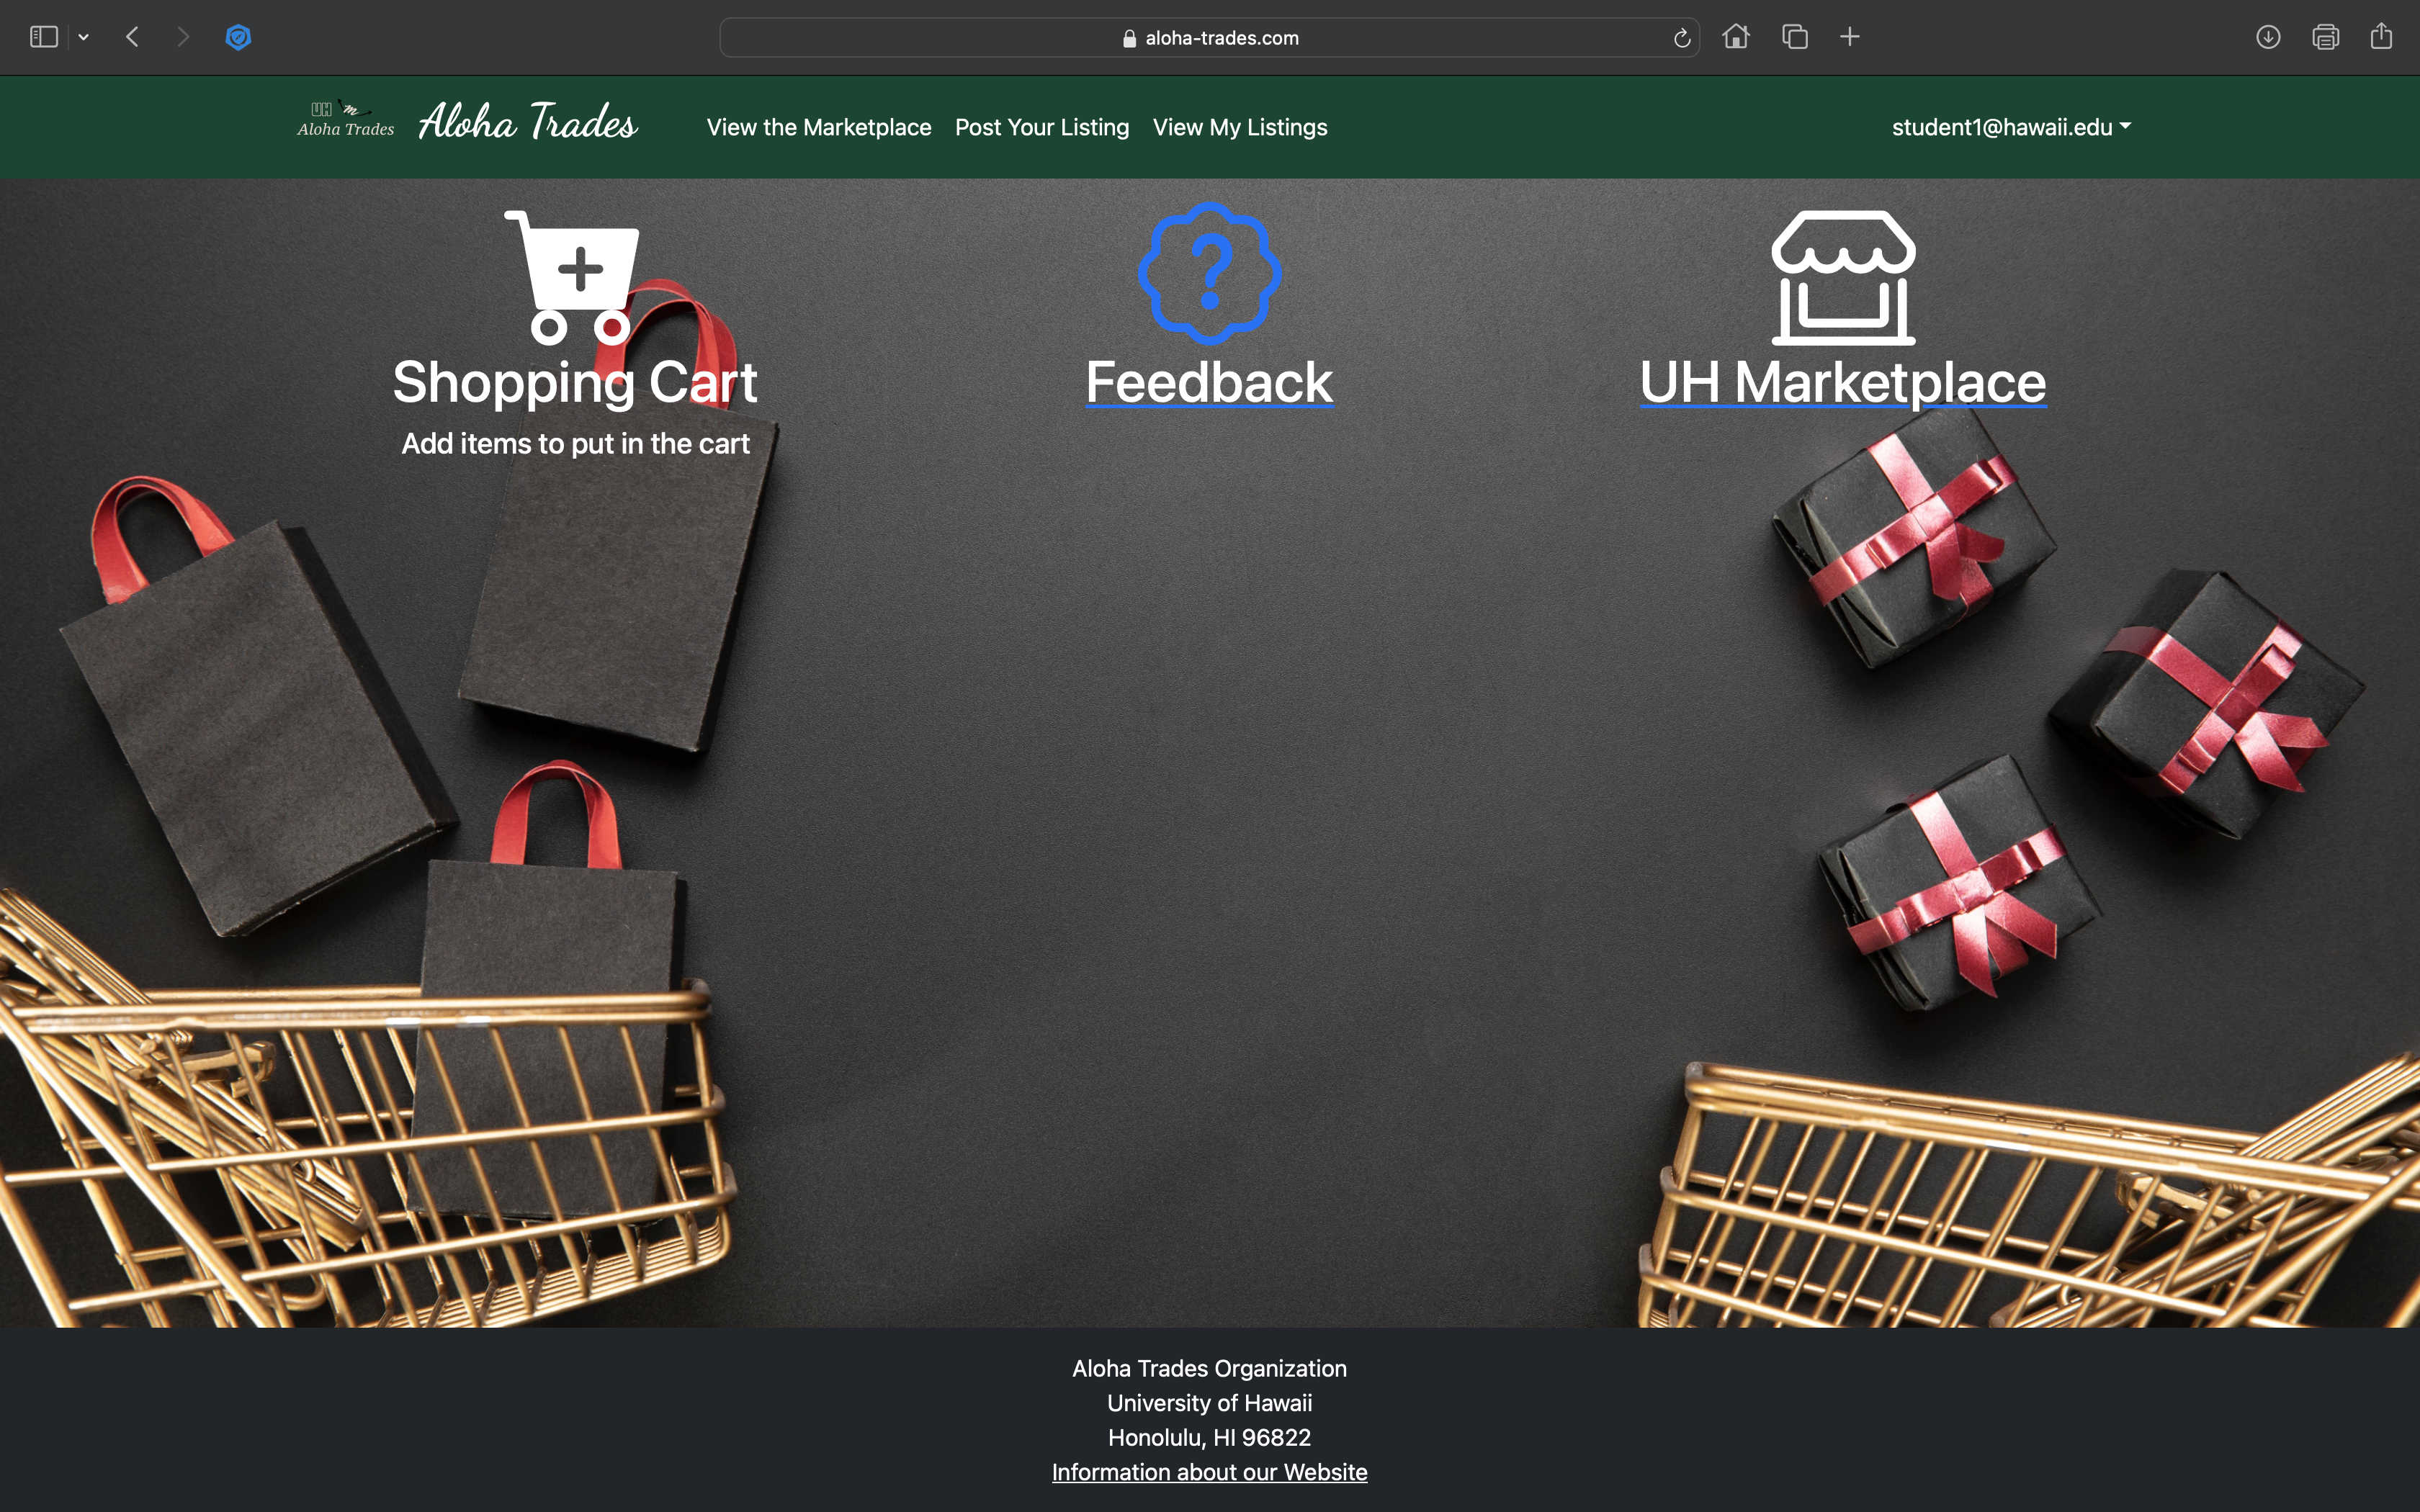
Here you have access to your shopping cart, you can check your inbox (currently not implemented), and see the marketplace.
Users NavBar
The user will have options to 3 things, the marketplace, posting a listing, and viewing their listings.

View Marketplace
After logging in, you can view listings on the market and its respective sellers profile information like name, contact, and profile image. There is also a add to shopping cart button that puts it into your shopping cart so that you can find it after and email the seller that you want to buy it.
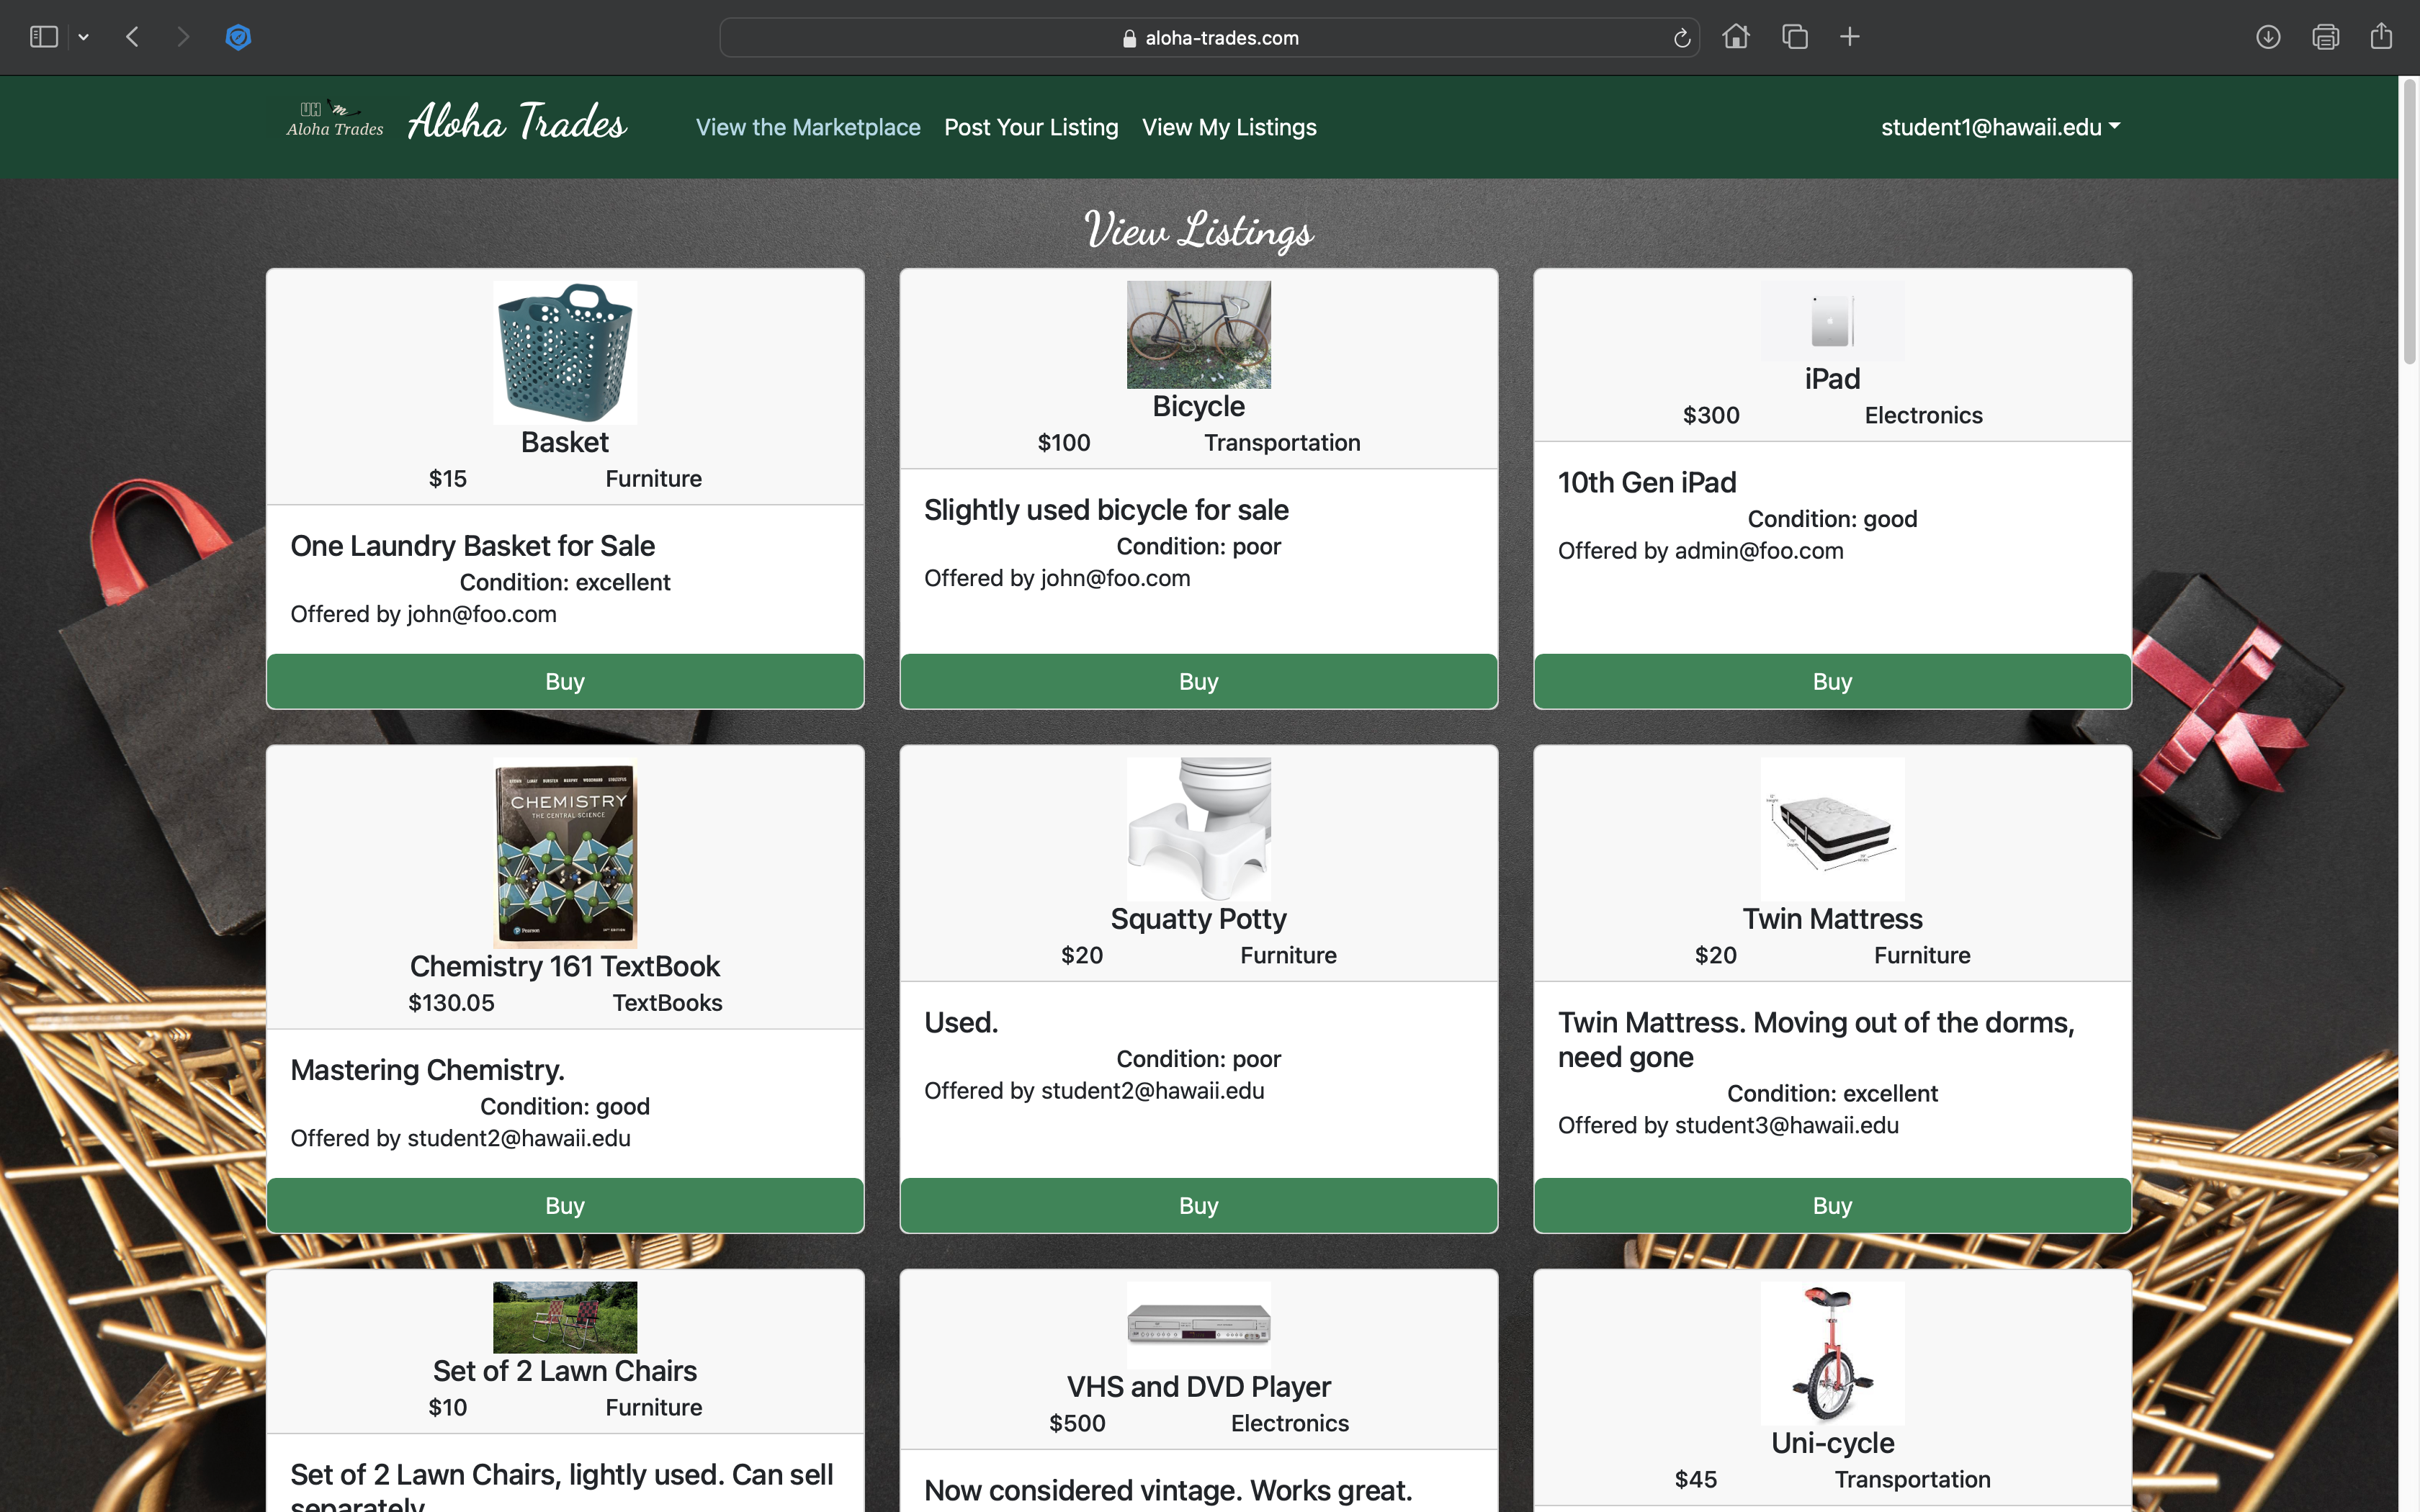
The marketplace will not show your listings.
View Shopping Cart (Could not implement in time)
When you wish to buy an item it will be placed into the shopping cart so that it is easy to find later to email the seller(s) when ready to make a plan to purchase.
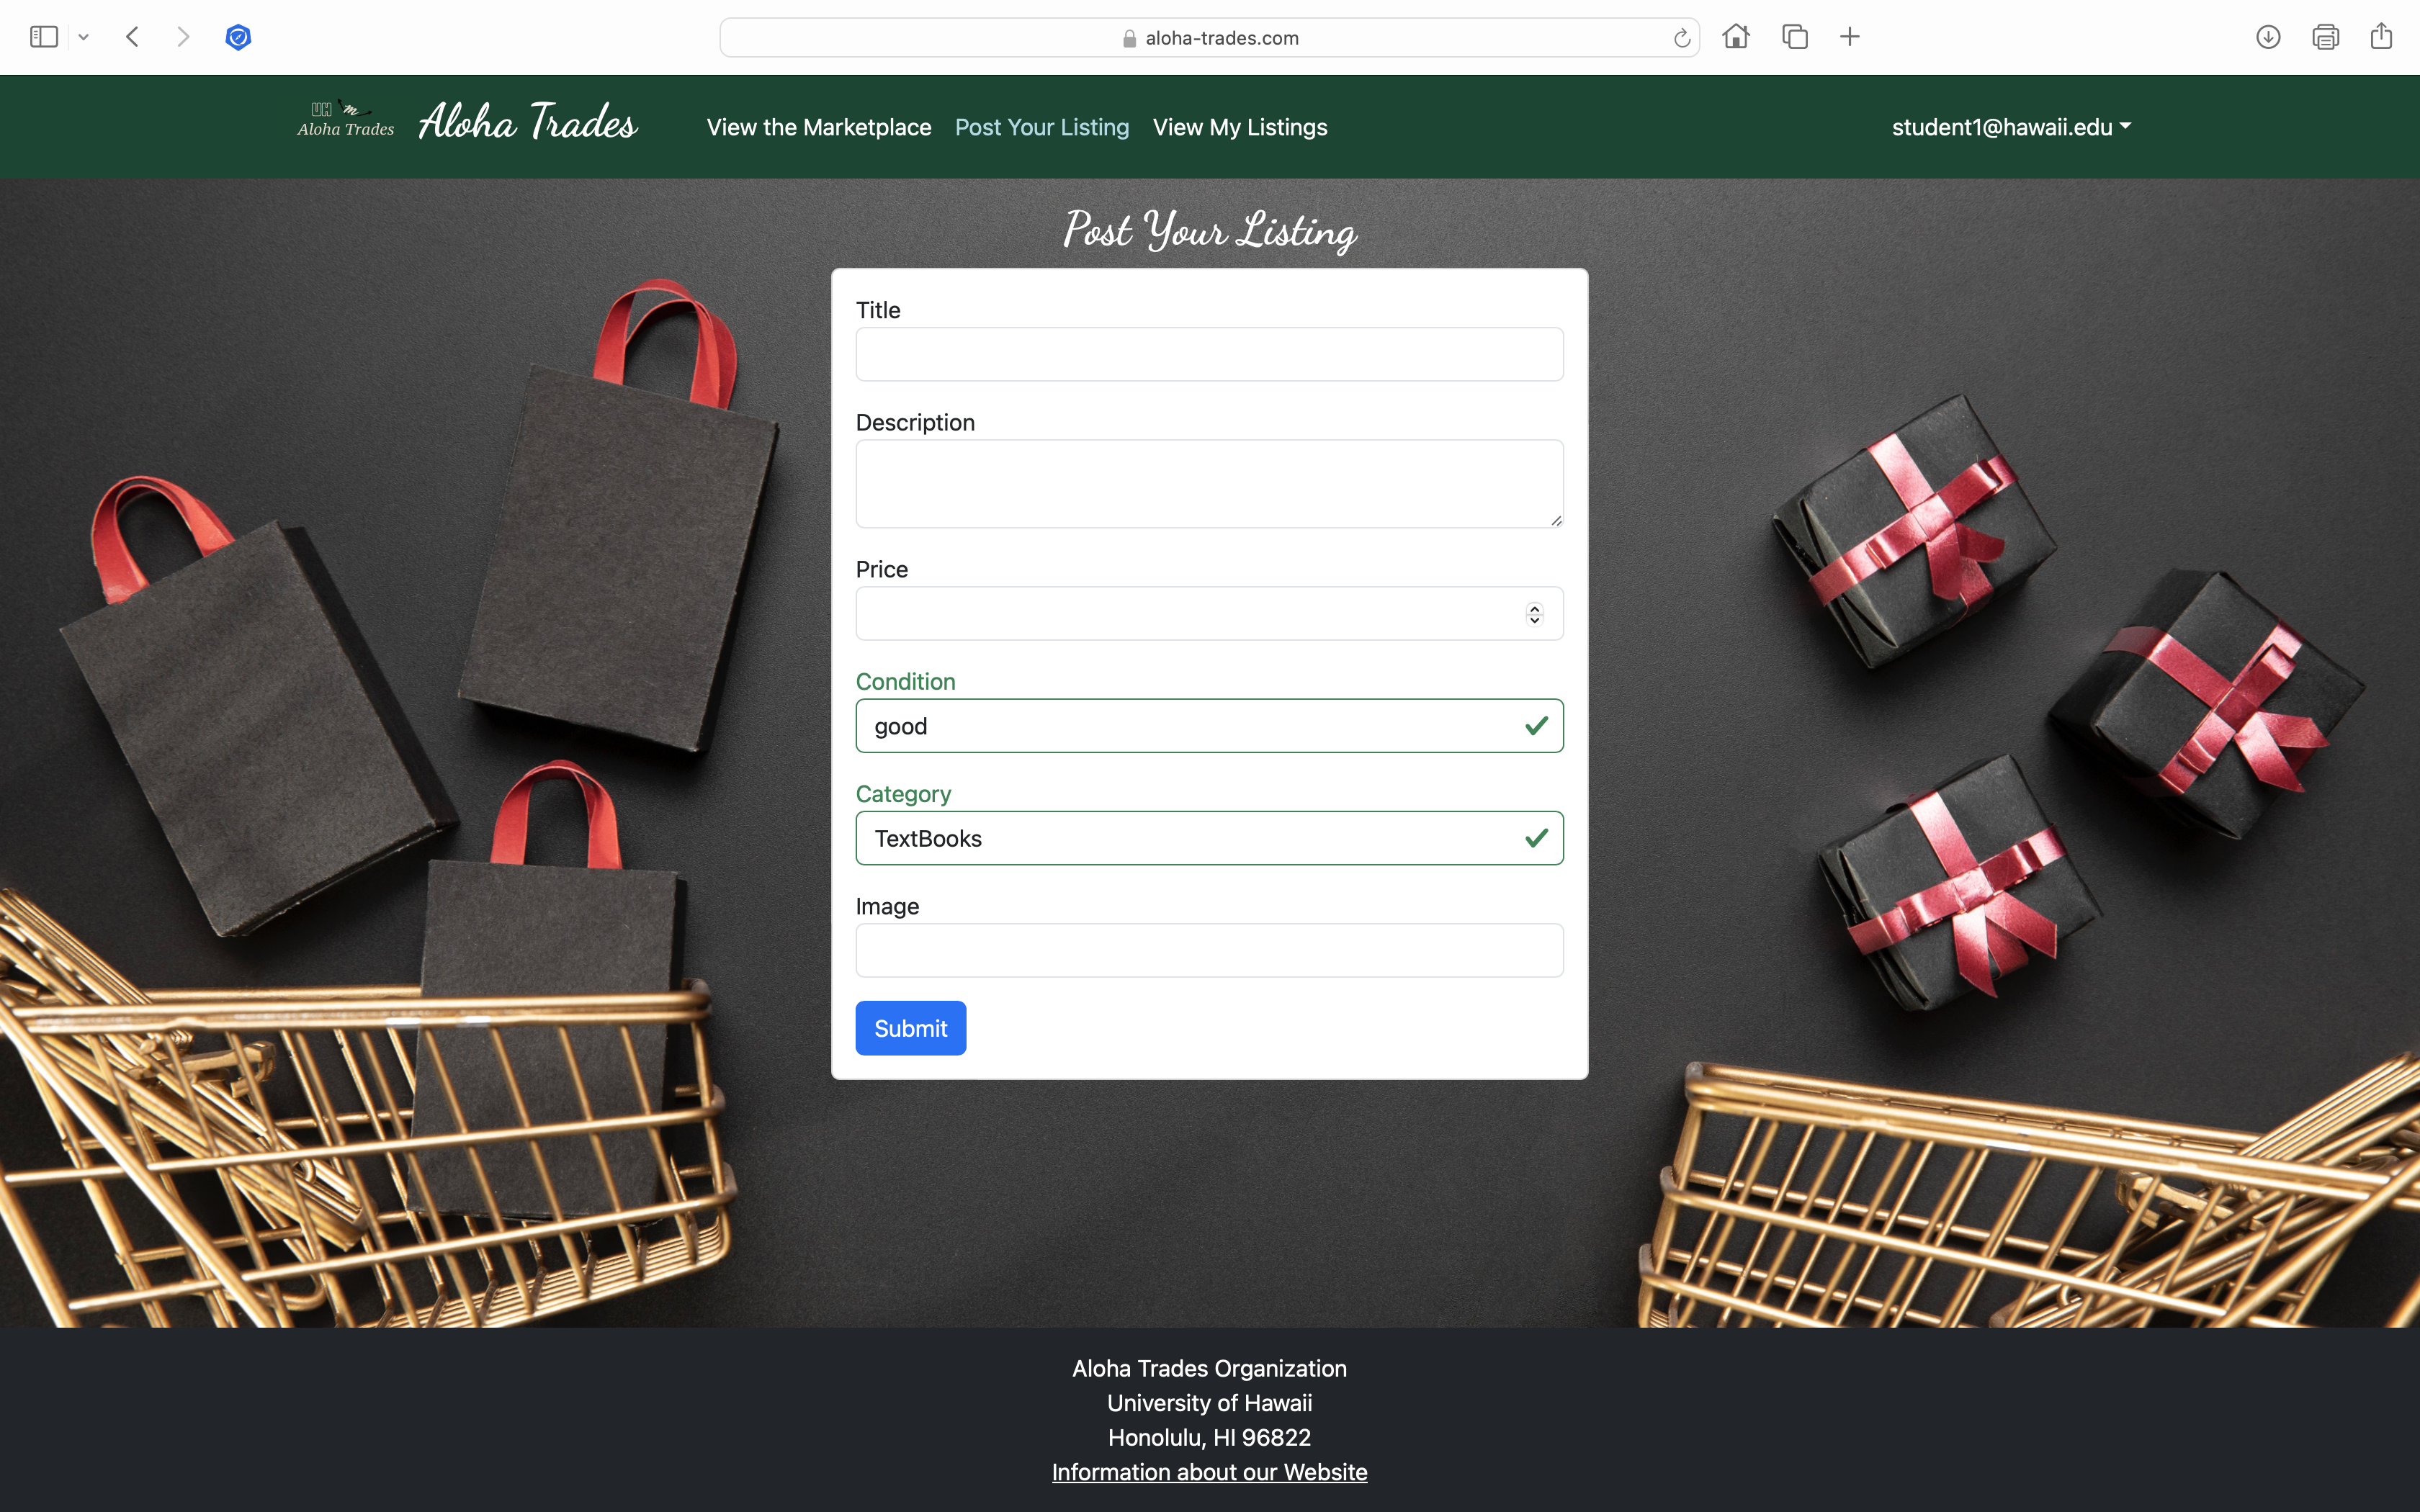
Post a Listing
After logging in, a user can post a listing. Fields required include: name, description, price, condition, category, and an image upload. Here is the page that allows you to create a item listing:
View Listings Page
After logging in, here is the page that allows you to see the listings you post:
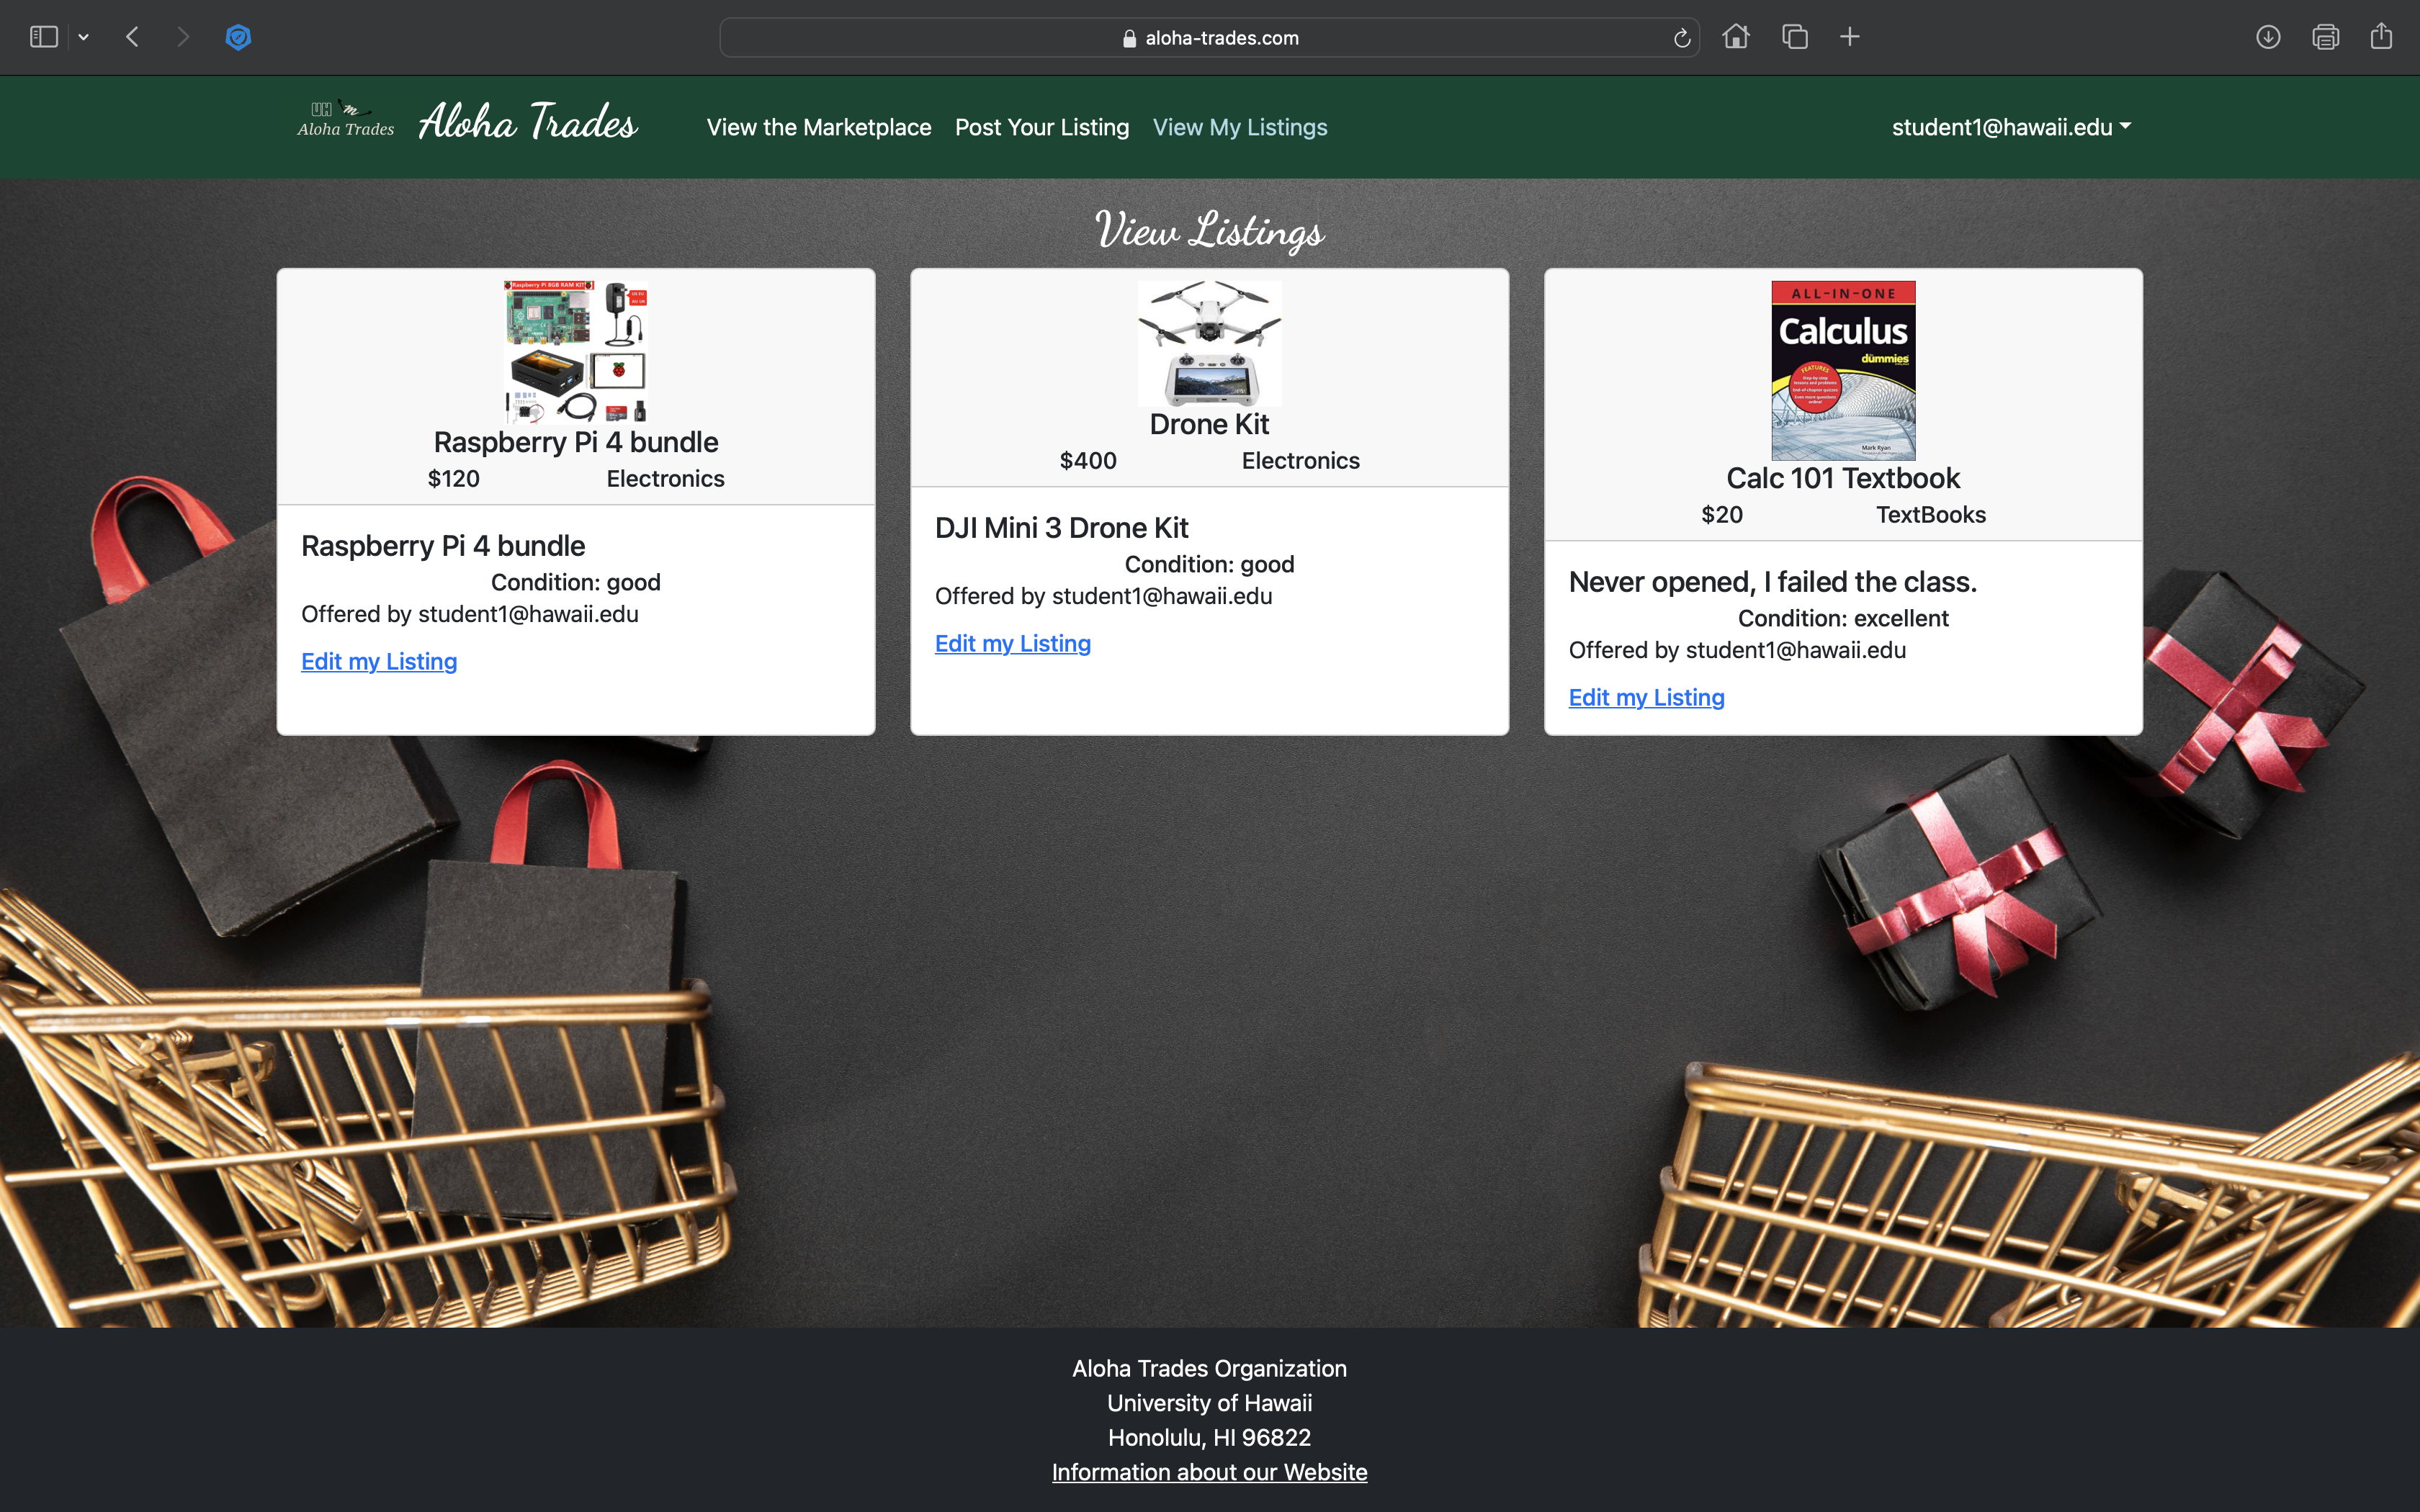
Later if you want to edit your listings you can click the “Edit” link to go to the Edit Listing page, shown next.
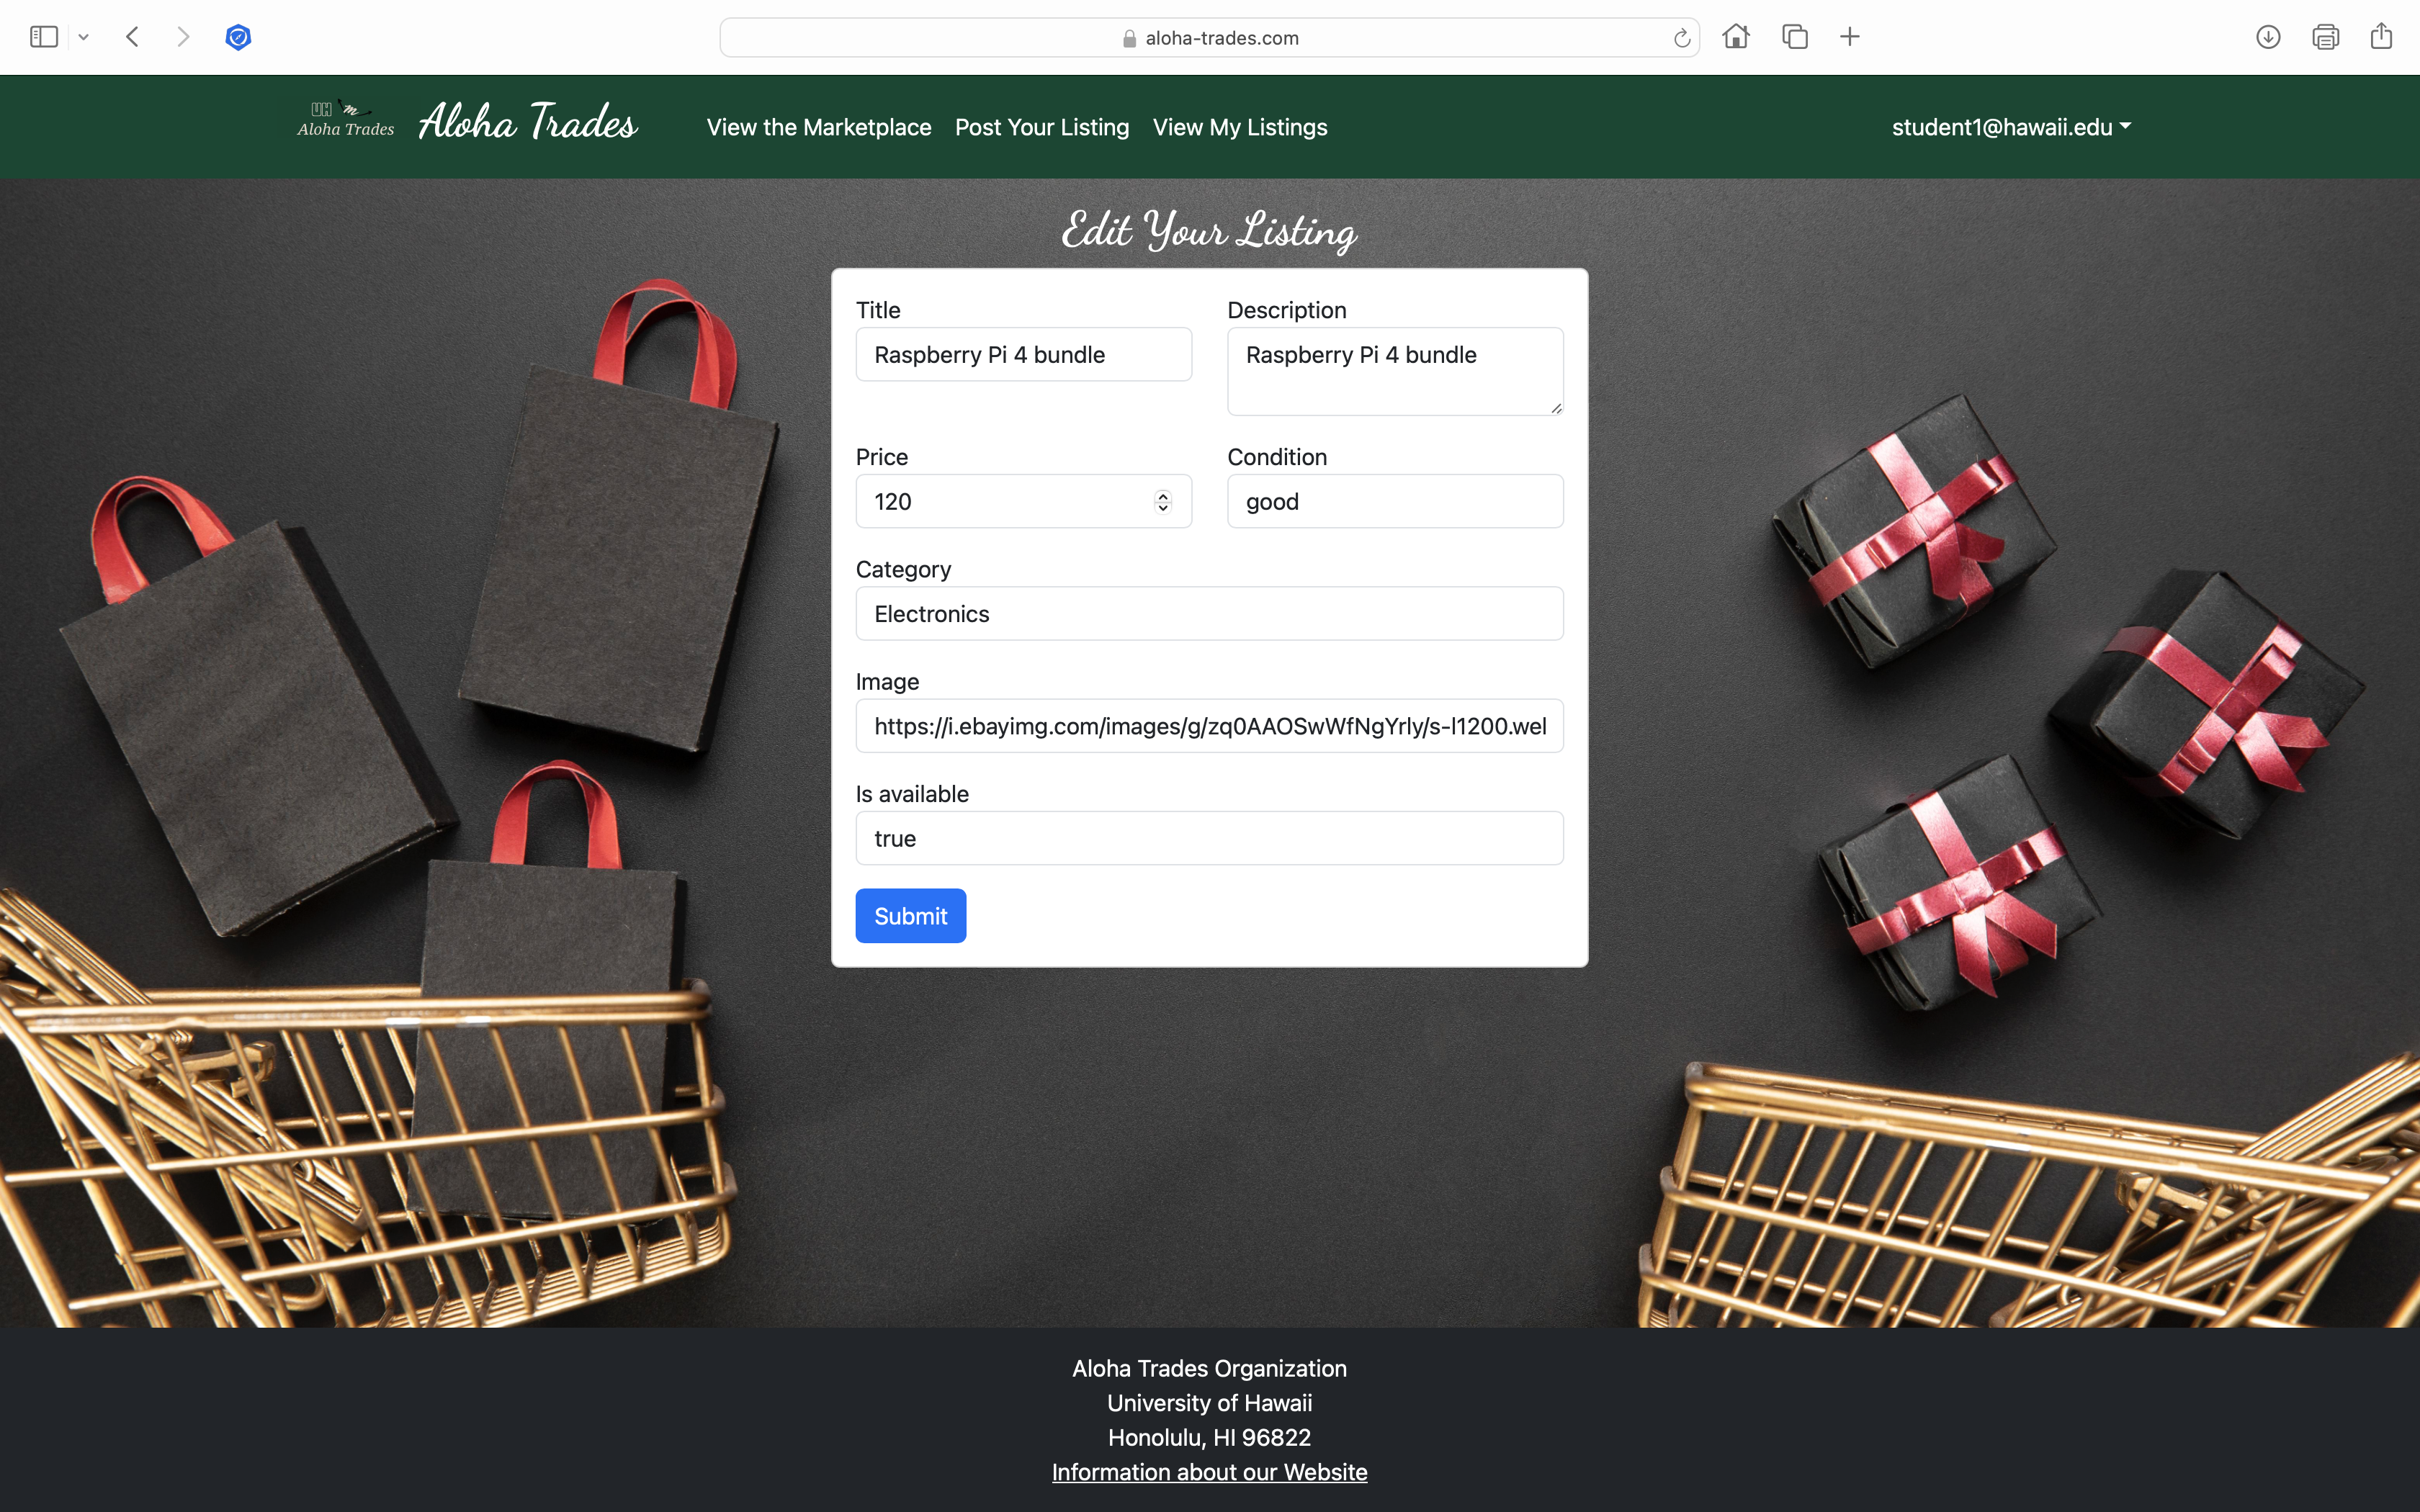
Edit Item Page
After clicking on the “Edit” link associated with an item, this page displays that allows you to change and save it:
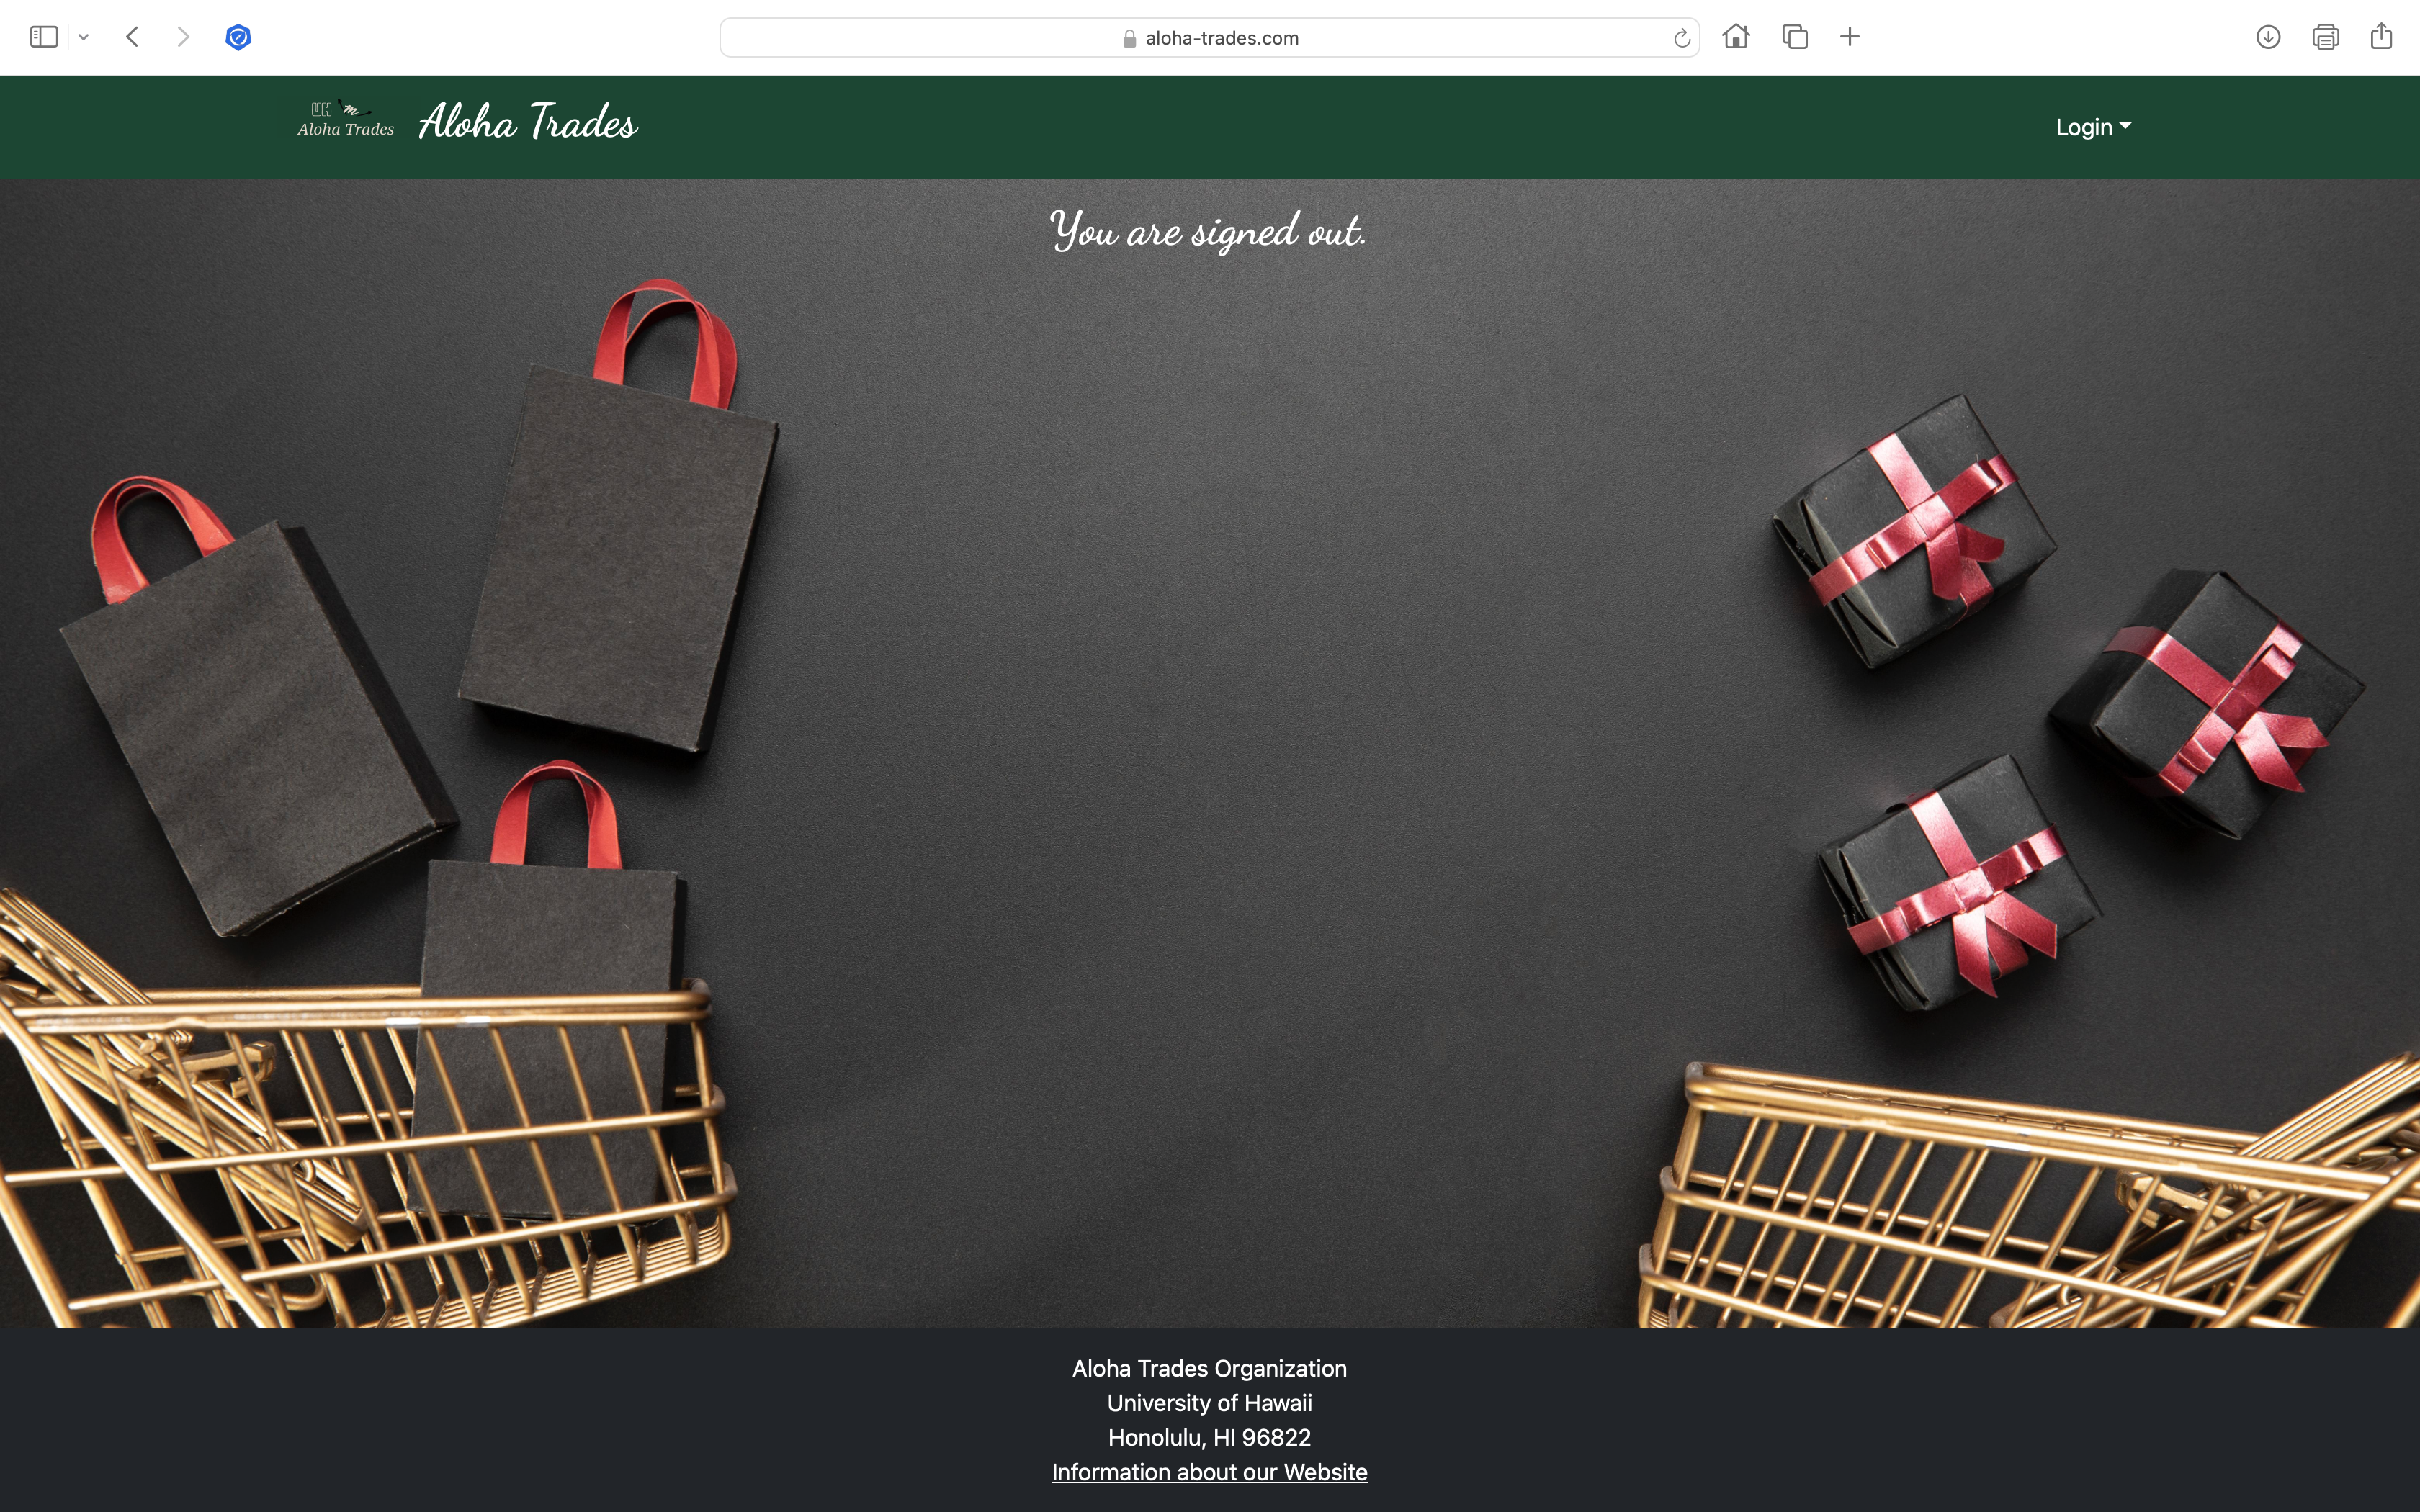
Sign-out Page
This is what you will see after signing out.
NavBar (after Login), Admin user
You can define an “admin” user in the settings.json file. This user, after logging in, gets a special entry in the navbar:

This entry allows the admin to see all the listings on the site that have been approved and not approved.
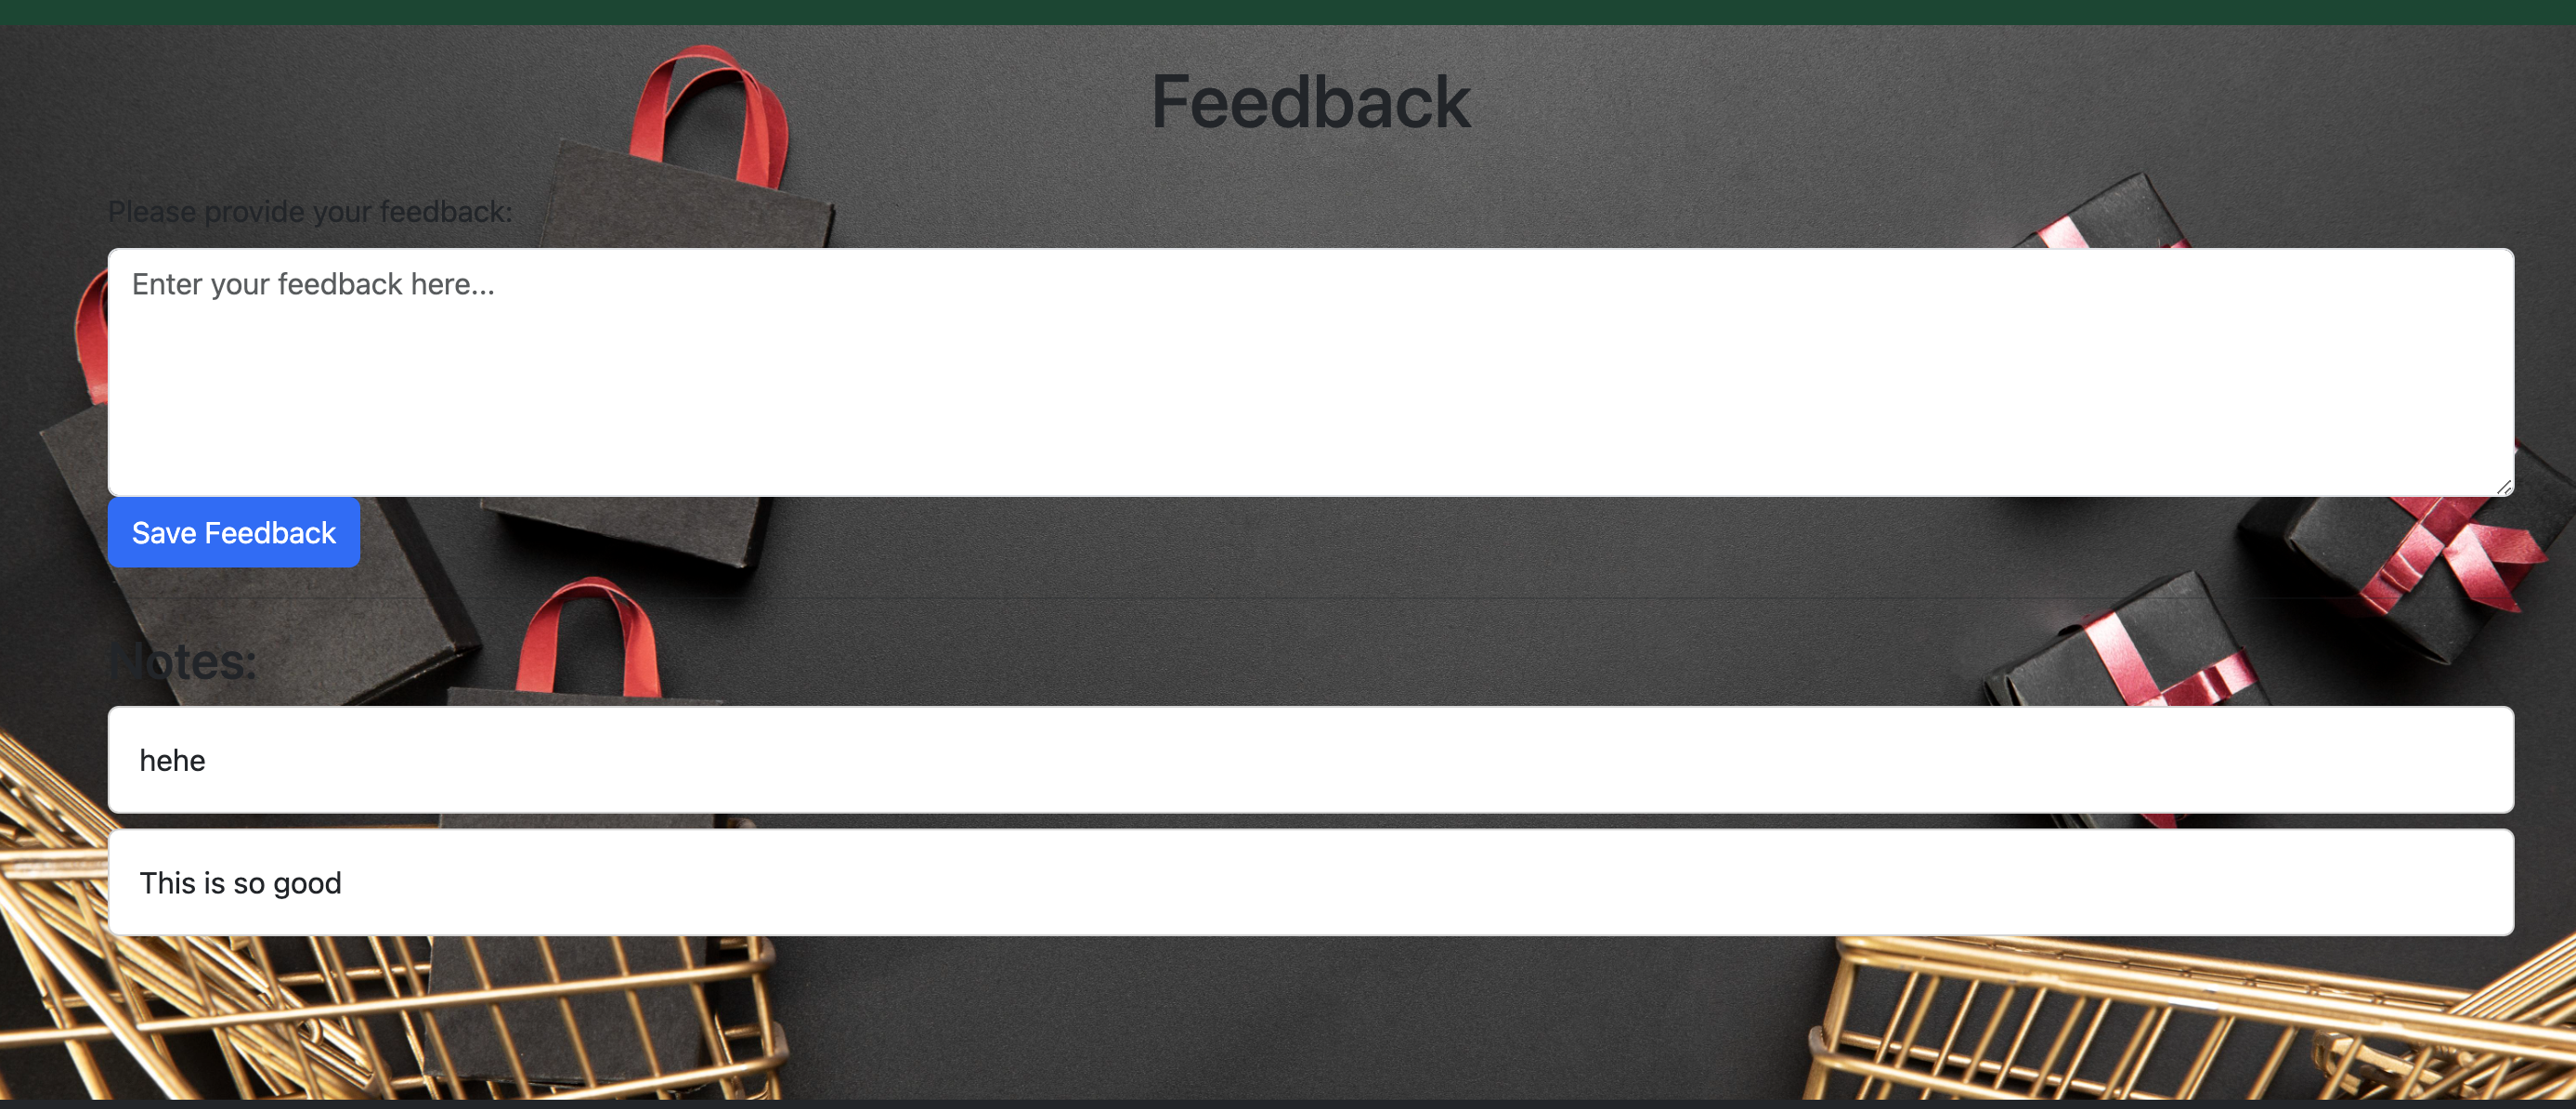
Feedback Page
If there are concerns or wishes for improvements by the users then they can use this to give us the developers feedback.
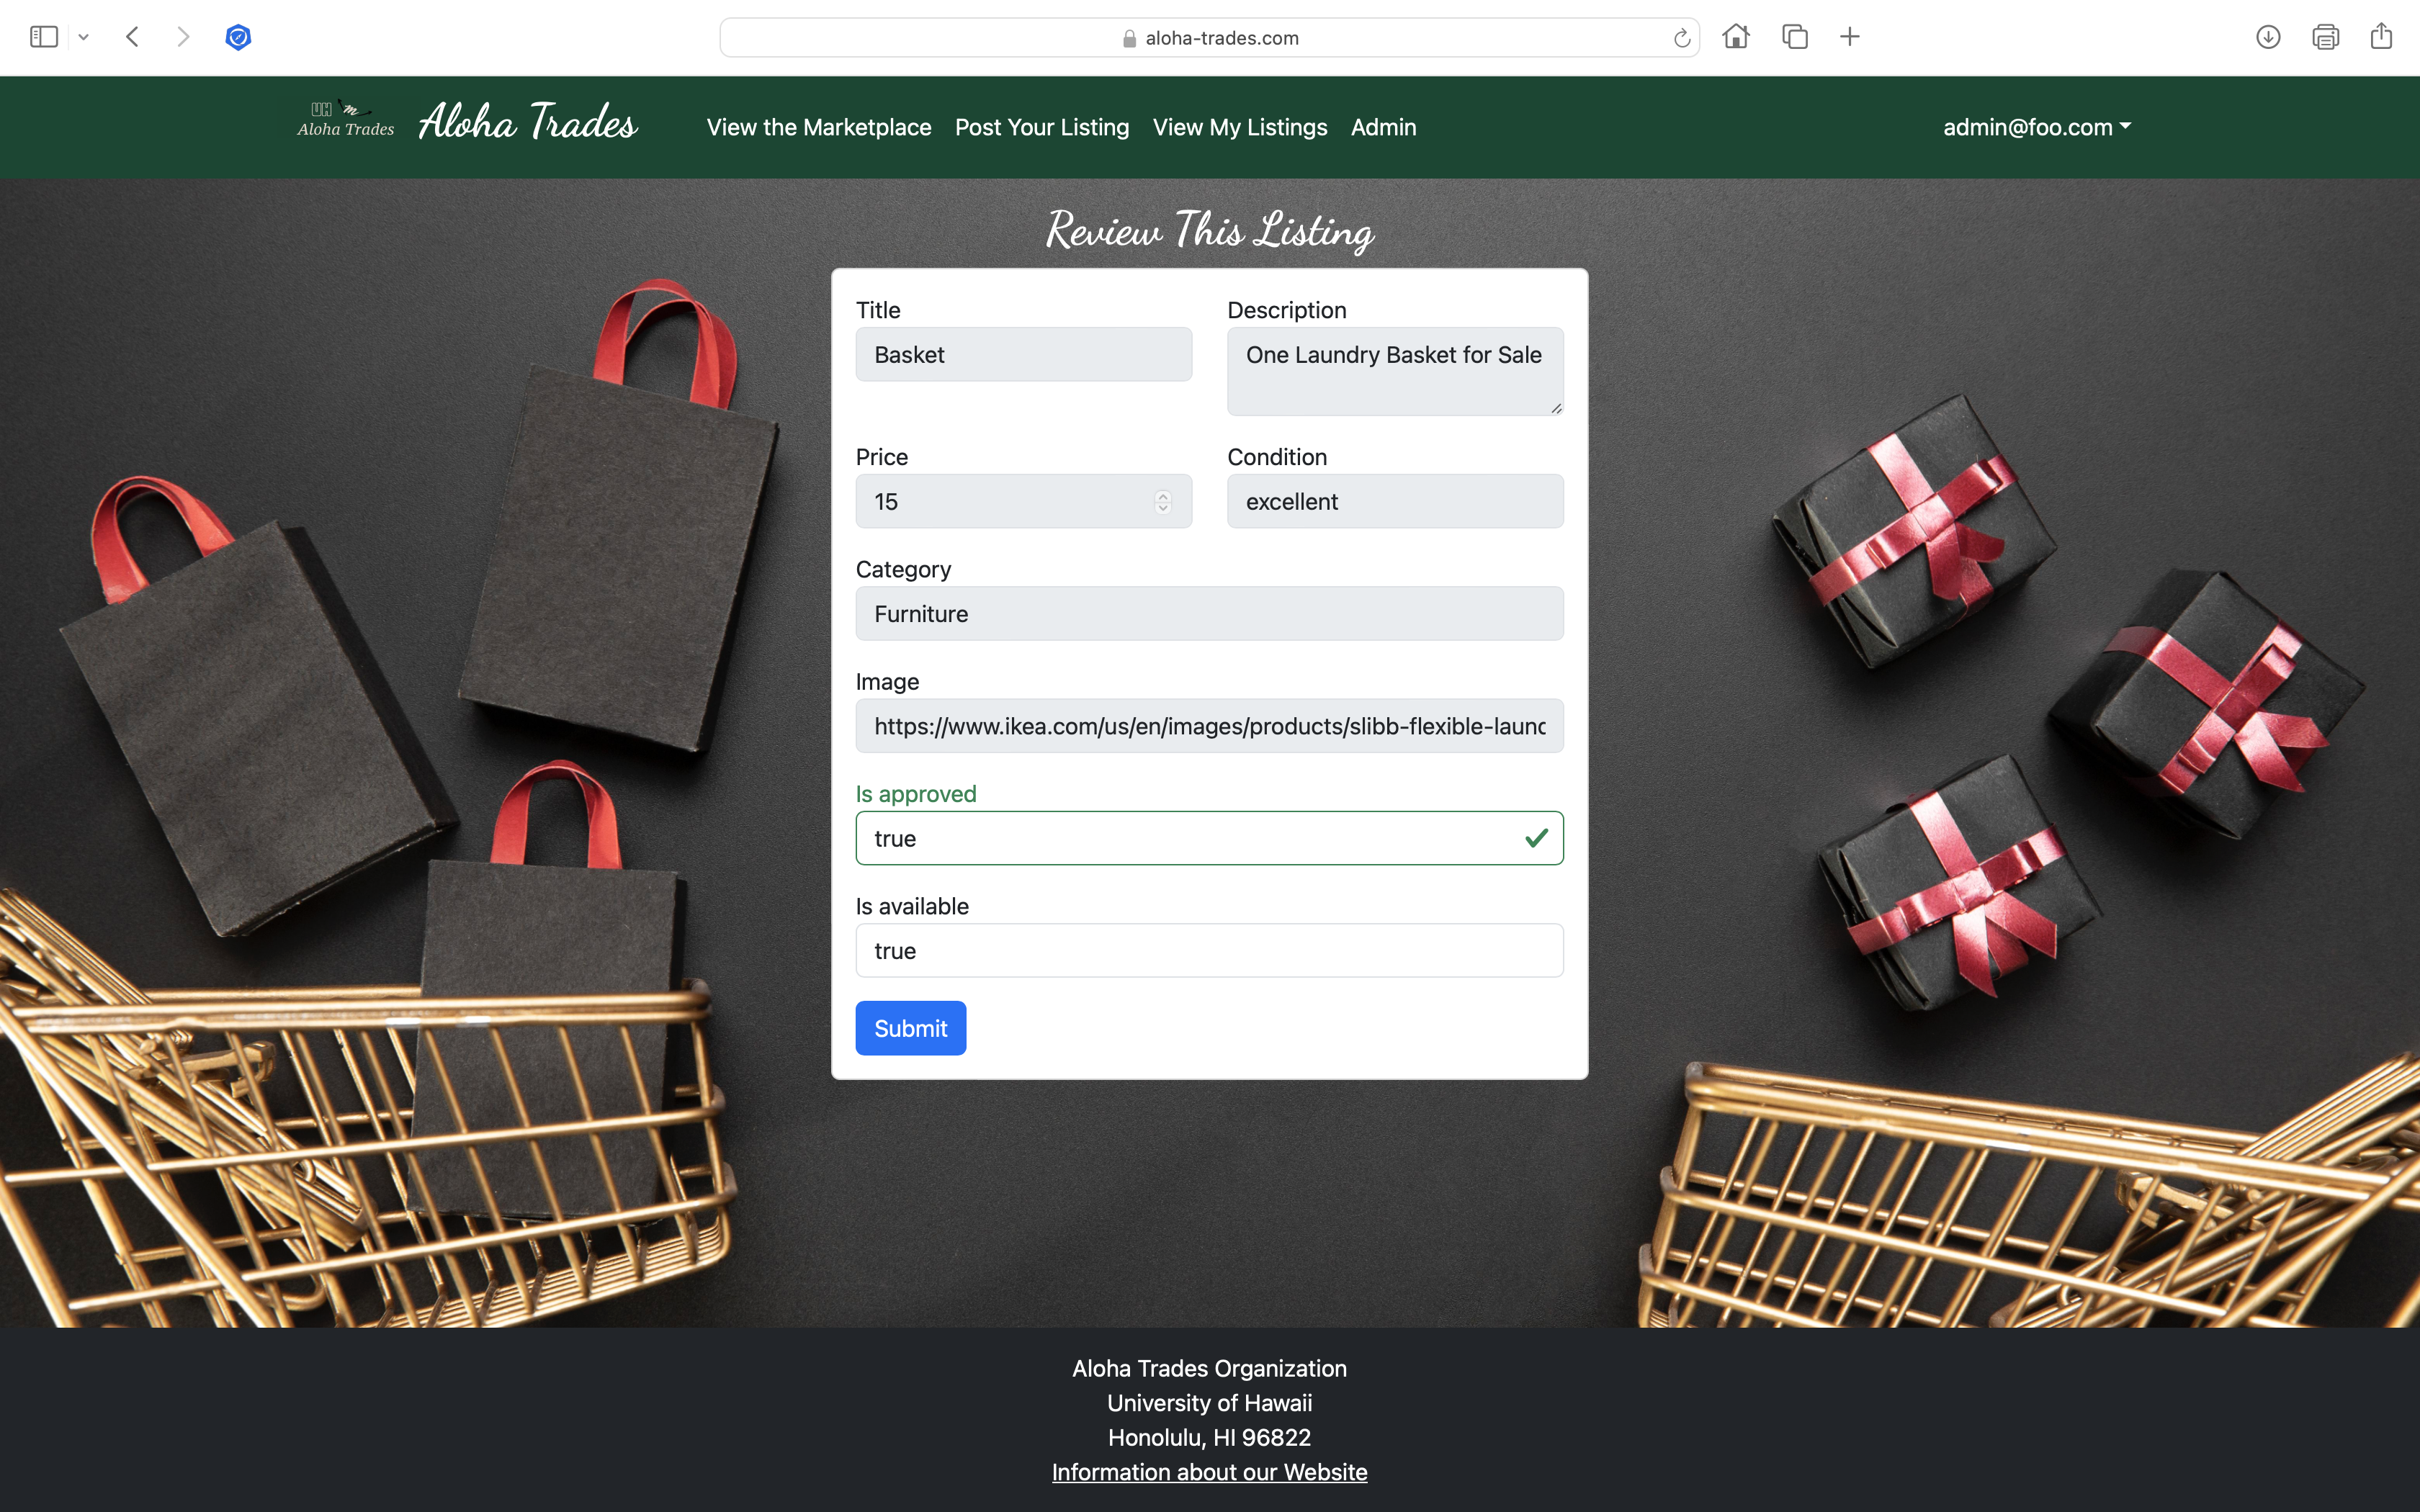
Admin - Review and Approve Listings
Any listing posted must be approved by an admin. While this may take time, it ensures quality of the listings on the site by keeping malicious actors who may be using ‘codewords’ or suspicious activity down to a minimum (ideally zero).
Listings that have not been approved by the admin are colored red.
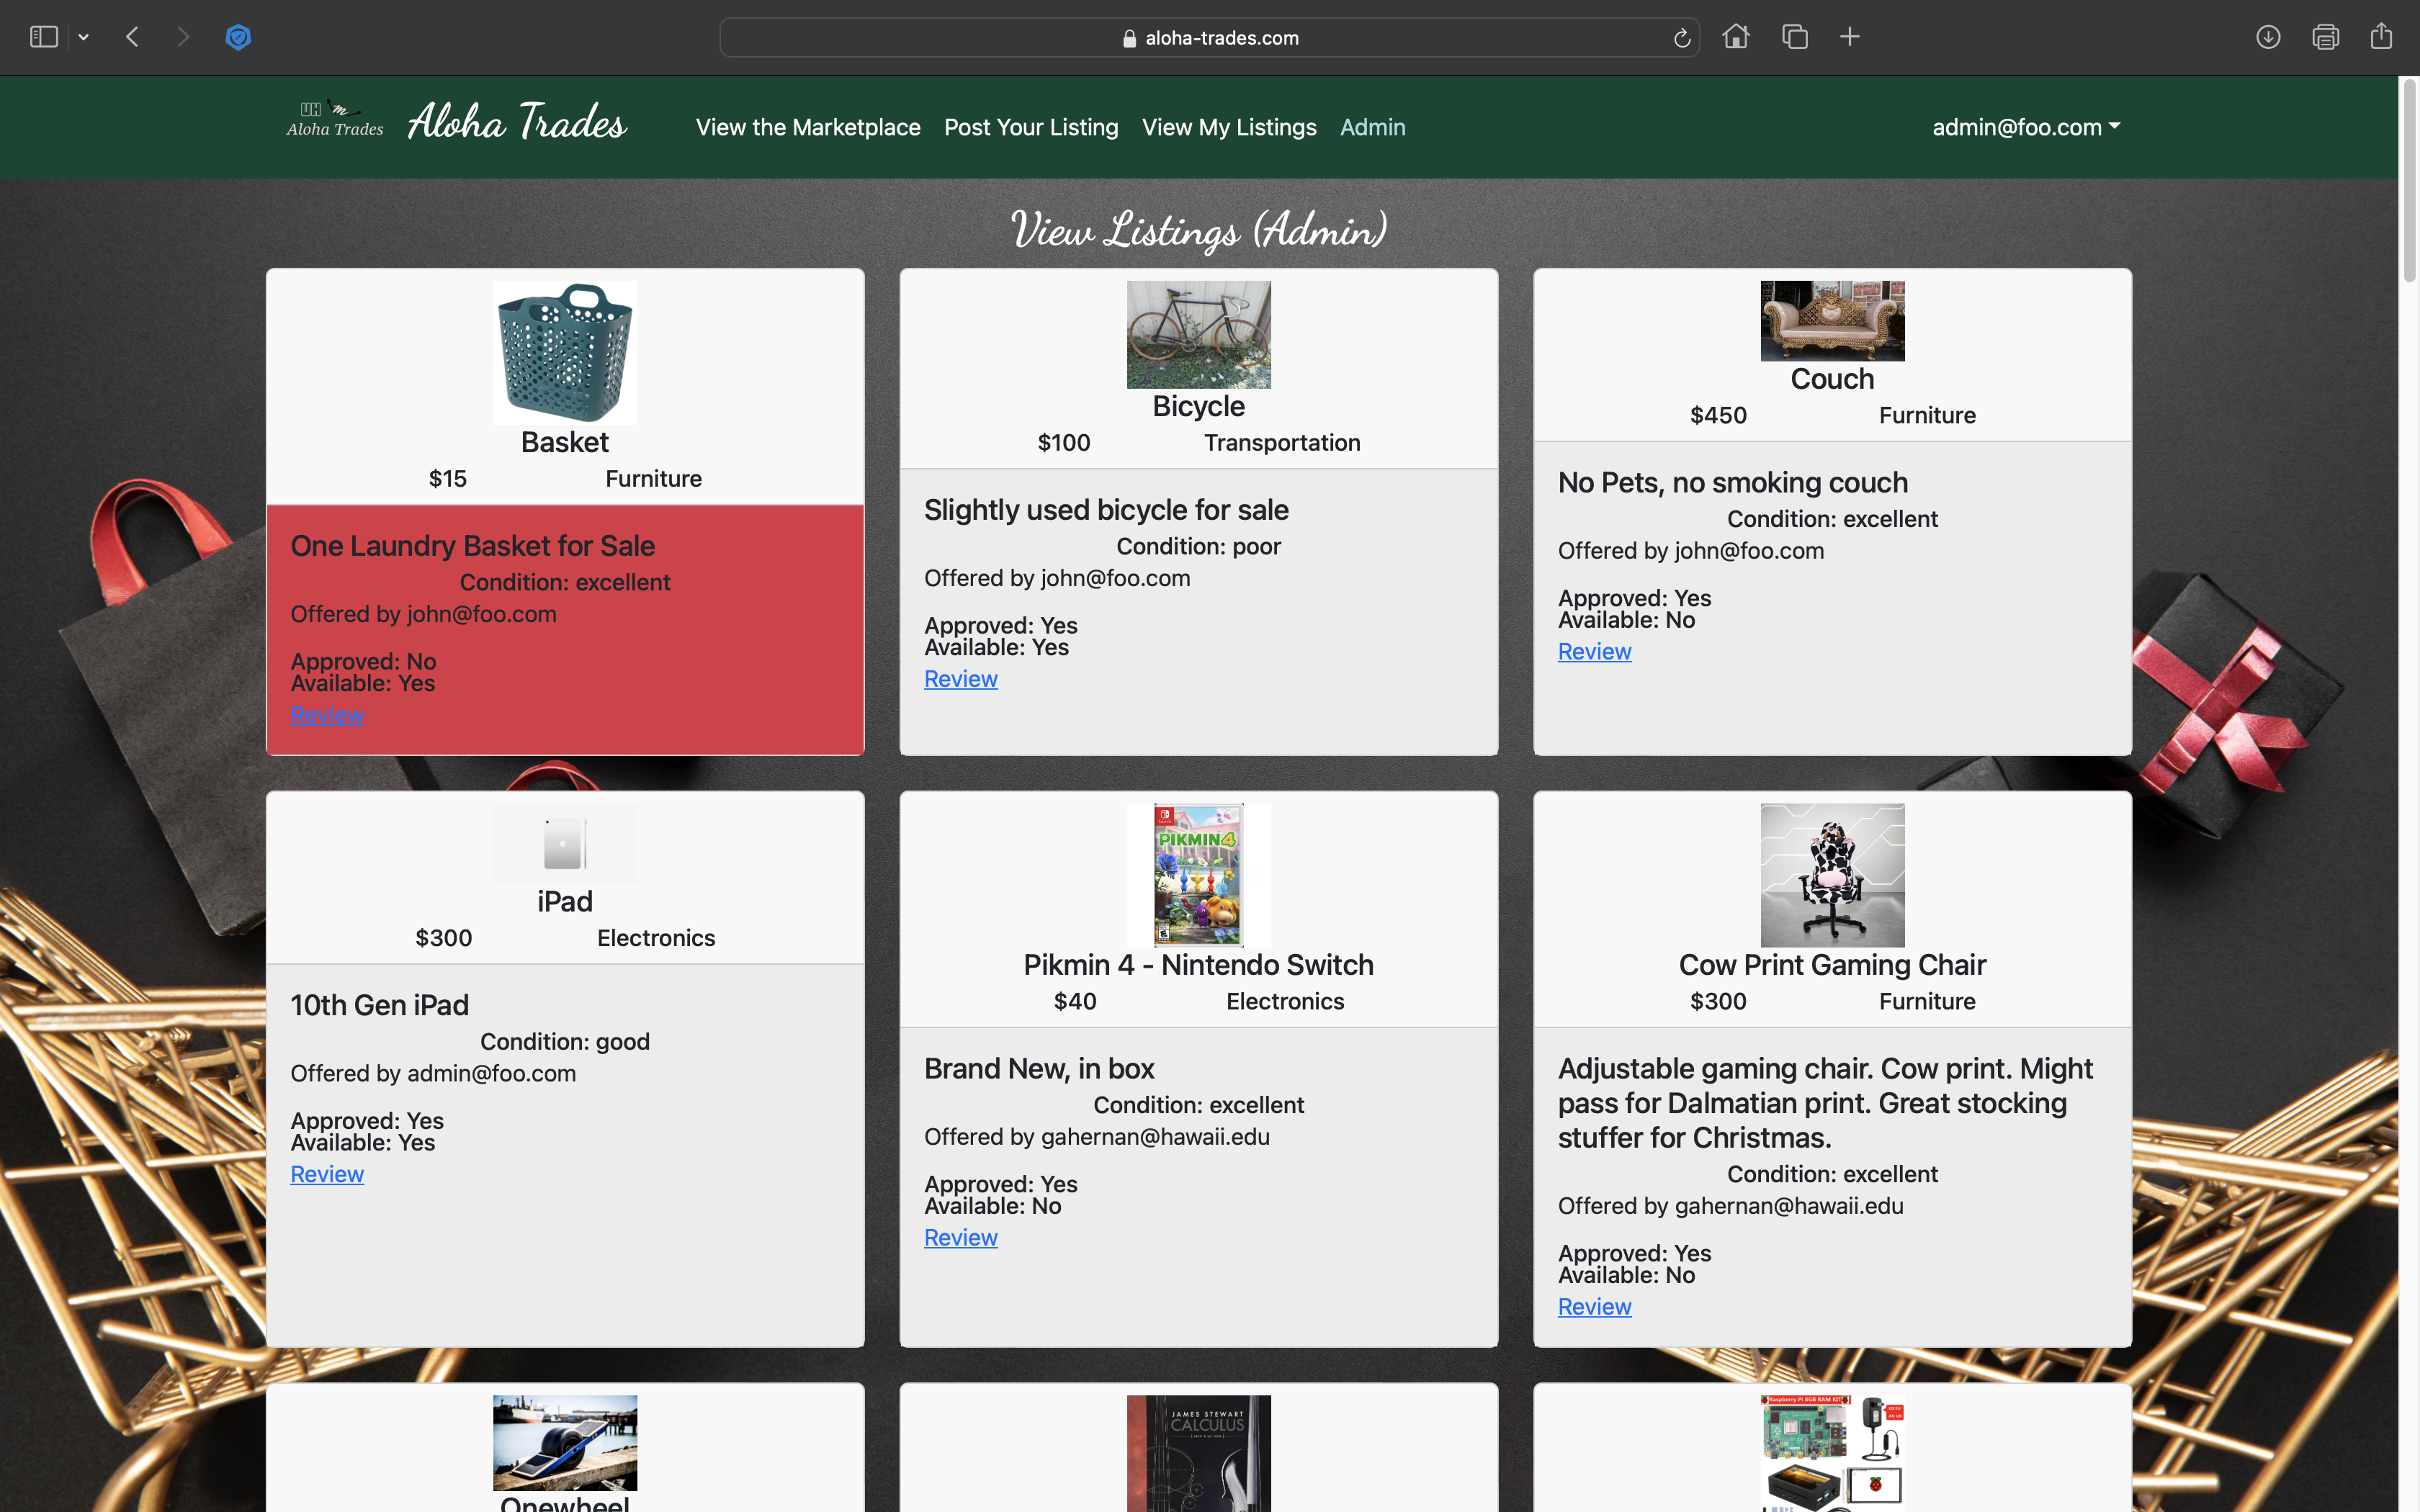
Admin users can approve or deny a post from being listed on the listings page by selecting is approved true or false.

Community Feedback
Student A likes that our application adheres to UH students in giving them a place to sell their items that are meant for other college students. A couple of the things they said we could fix is the icons on the landing page should be white and the positions of where it says the item description and who the item is offered by should be switched.
Student B said, “The interface is really simple and works just the way you would expect an online marketplace would be. I hope more of these online marketplace would be implemented here in Hawaii to promote ecommerce.”
Student C said, “The app is very easy to use and I like how straightforward it is. I just hope they optimized it for mobile devices as well.”
Student D said, “This website is incredibly user-friendly and straightforward. I appreciate how they’ve implemented restrictions, ensuring that only UH Manoa students can access it. This security measure ensures that transactions exclusively occur among students, maintaining a secure environment.”
Student E said, “The website is very easy to use and I like how easy this makes it to sell my unwanted items/school related material to other students”
Developer Guide
Installation
First, install Meteor.
Second, download a copy of aloha-trades. Note that aloha-trades is a private repo and so you will need to request permission from the author to gain access to the repo.
Third, cd into the app directory install the required libraries with:
$ meteor npm install
Running the system
Fourth, once the libraries are installed, you can run the application by invoking the “start” script.
$ meteor npm run start
The first time you run the app, it will create some default users and data. Here is the output:
 meteor npm run start

> meteor-application-template-react@ start /Users/jason/Downloads/Documents/Code/GitHub/aloha-trades/app
> meteor --no-release-check --exclude-archs web.browser.legacy,web.cordova --settings ../config/settings.development.json

[[[[[ ~/Downloads/Documents/Code/GitHub/aloha-trades/app ]]]]]

=> Started proxy.
=> Started HMR server.
=> Started MongoDB.
I20231211-18:27:52.987(-10)? Creating the default user(s)
I20231211-18:27:53.000(-10)?   Creating user admin@foo.com.
I20231211-18:27:56.187(-10)?   Creating user john@foo.com.
I20231211-18:27:56.276(-10)? Creating default data.
I20231211-18:27:56.276(-10)?   Adding: undefined (john@foo.com)
I20231211-18:27:56.875(-10)?   Adding: undefined (john@foo.com)
I20231211-18:27:56.881(-10)?   Adding: undefined (john@foo.com)
=> Started your app.

=> App running at: http://localhost:3000/
I20231211-18:27:57.488(-10)? Monti APM: Connected
Periodically, you might see Error starting Mongo (2 tries left): Cannot run replSetReconfig because the node is currently updating its configuration after the => Started HMR server.. It doesn’t seem to be a problem since the MongoDB does start.
Viewing the running app
If all goes well, the template application will appear at http://localhost:3000. You can login using the,
- user credentials: john@foo.com & pw: changeme
- admin credentials: admin@foo.com & pw: changeme
- or else register a new account.
ESLint
You can verify that the code obeys our coding standards by running ESLint over the code in the imports/ directory with:
meteor npm run lint
Contact Us
Aloha Trades is desgined, implemented, and maintained by Gerardo Hernandez, Jason Enojardo, Raphael Adona, and Zheng Chen He.